If Windows is installed on your server, multiple users can work with it at the same time. But for that it’s needed to create a new user and activate the Remote-Desktop service (RDP).
Quick guide
- Create user
- Set password
- unlock this user for RDP
- login via RDP
In this article we explain step by step how a new user can use the windows server via remote.
Create a new user
Open the start menu and click on ”settings” – in the following window you click on ”accounts”. Click on ”other users” – there you can find a big ”add” button.
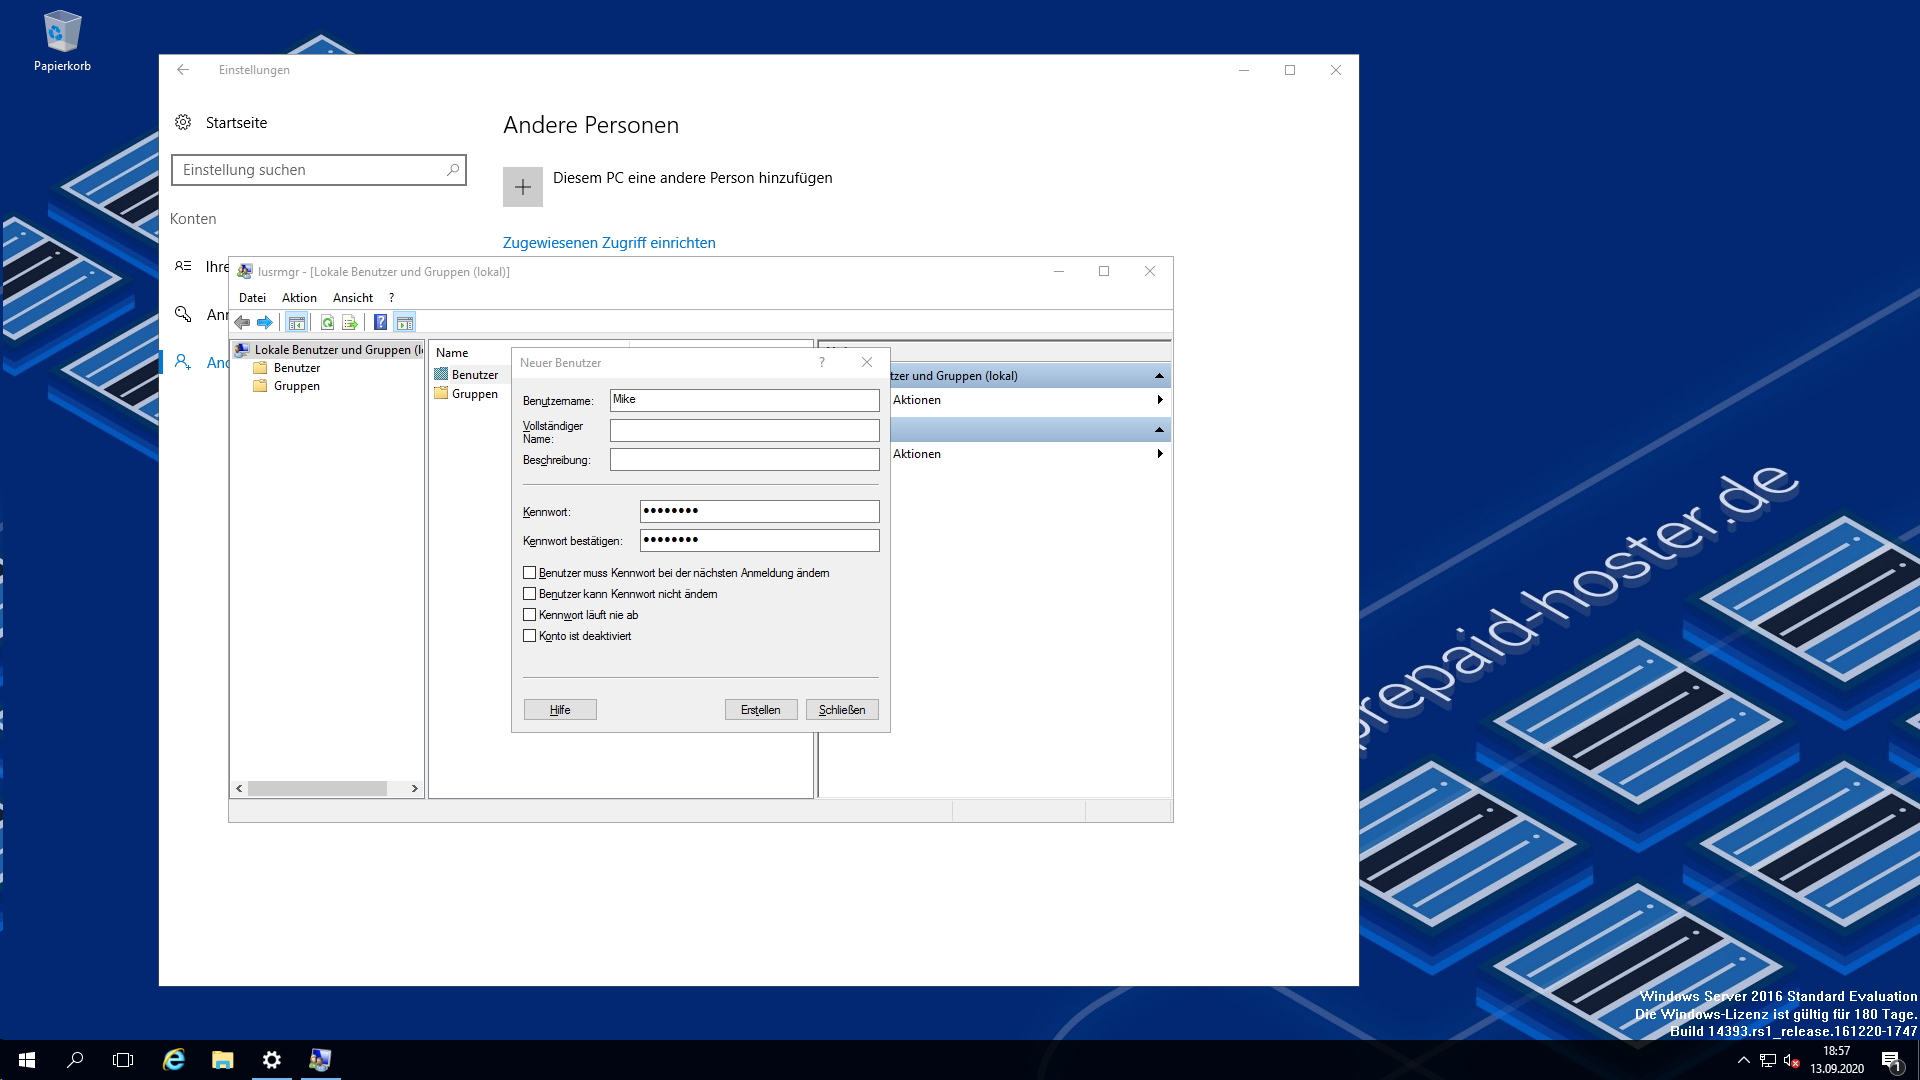
The user management opens. Do a right-click on ”user” and choose ”new user”.
Now you have to fill in the form. It’s important that username and password are set. Other fields can get filled in at will.
Activate remote desktop for the new user
The new user is registered in the system – so you can now activate the remote desktop.
Do a right click on the windows logo in the bottom left corner of your taskbar. Then click the entry ”system”. In the opening dialogue you choose ”Remotesettings”.
Now we are clicking the ”select users” field. A list of users will appear – the admin is set as unlocked to RDP by default. If we click the ”add” button – a search dialogue opens. In the big field you have to search for the newly created user and click on ”ok”.
Ultimately you have to confirm the upcoming dialogue-fields.
Login via remote desktop
The login is a little tricky because you have to enter the format ”computername/username”. Otherwise the user can’t get identified and the password will be shown as incorrect. You can find the computer name in the ”system” window that is still open. To make it easier note the characters.
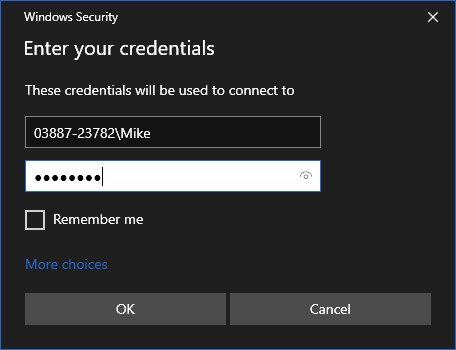
In our case the users full name would be 03887-23782\Mike. If the password you enter is correct – the new user is logged in.