To use a server effectively, it’s important to know the relevant network ports. These ports allow communication between different services and applications. Below is a list of common ports often used on Linux and Windows servers.
Would you like to set up an FTP server on your Windows server? With FileZilla Server, it’s very easy. In this guide, I will show you step by step how to proceed and how to assign specific folder permissions to a user.
Guide
Step 1: Download and install FileZilla Server
Visit the FileZilla website and download the latest version of FileZilla Server.
Run the installation file and follow the installation instructions. Make sure to keep the default ports.
Step 2: Configure FileZilla Server
Start FileZilla Server and open the admin interface.
Log in using the default information (if you kept the default values during installation).
Step 3: Create a user
In the admin interface, click on “Edit” and then on “Users”.
In the new window, click on “Add” and enter a username. Confirm with “OK”.
Select the newly created user and go to “Shared folders”.
Step 4: Set folder permissions
Click on “Add” under “Shared folders” and select the directory that the user should have access to.
Set the permissions for the user, such as read, write, delete, etc.
Step 5: Set a password
While you have the user selected in the “Users” window, go to “General”.
Enable the checkbox “Password”.
Enter a secure password and confirm it. Example:
Username: ftpuser
Password: SecurePassword123!
Step 6: Start and test the server
Click “OK” to save the changes.
Start the FileZilla Server by clicking on “Server” and then “Start” in the admin interface.
Test the FTP connection with an FTP client by entering the IP address of your server, the username, and the password.
Important note about the firewall
Don’t forget to open the required ports in your firewall. Here is a helpful guide: Open Windows Firewall ports.
Quick guide: Opening ports
To ensure the smooth operation of your FTP server, certain ports need to be opened in your firewall:
FTP port 21: For the standard FTP connection.
Passive FTP ports (range 50000-51000): For passive FTP connections.
Follow these steps to open the ports:
Open Windows Firewall with Advanced Security.
Click on “Inbound Rules” and then “New Rule”.
Select “Port” and click “Next”.
Select “TCP” and enter the specific port or range (e.g. 21, 50000-51000).
Select “Allow the connection” and click “Next”.
Select the profiles for which the rule should apply and click “Next”.
Give the rule a name (e.g. “FTP Ports”) and click “Finish”.
With this guide, your FTP server should be ready to use. Good luck!
If you rent a Windows Server from us, we automatically equip the server with an evaluation (trial) license. This license is valid for 180 days and can be used during the system setup. After this period, a valid Windows license must be provided.
If your 180-day trial period is not enough, you can reset your serverâs trial period up to 5 times.
Open the Windows Command Prompt as an Administrator (cmd) and enter the following command:
slmgr.vbs /rearm
This command resets the trial license period that has already elapsed. After entering this command, a server restart is necessary.
Your server is now usable for another 180 days.
License Terms
It is important to note that failing to activate Windows, even if the system seems to work fine after the intended period, constitutes a violation of the license terms agreed upon with Microsoft.
PHPMyAdmin is a popular web-based open source application designed to manage MySQL databases. It allows users to conveniently manage databases through a web-based graphical user interface (GUI).
You can install phpMyAdmin fully automatically with root access in our web interface on any debian-based Linux.
To do this, go to the Cloud Manager of your server.
Scroll down to the Actions and select “App Installer”. There you click on the “Web Server Utilities”.
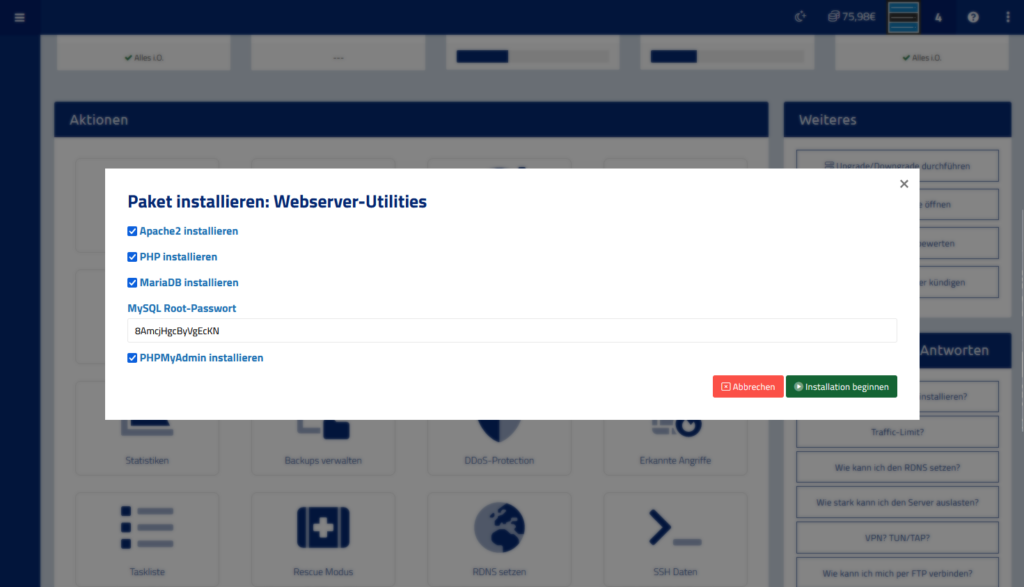
Install webserver Utilities
In this dialogue you have to select everything. This is because phpMyAdmin requires a web server (apache2), the PHP script engine and the database software MariaDB/MySQL server.
Then click on Start installation.
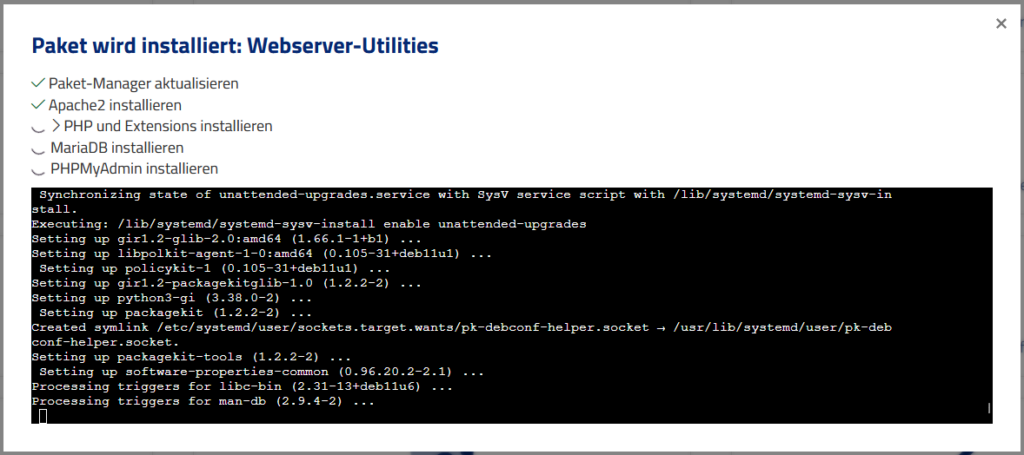
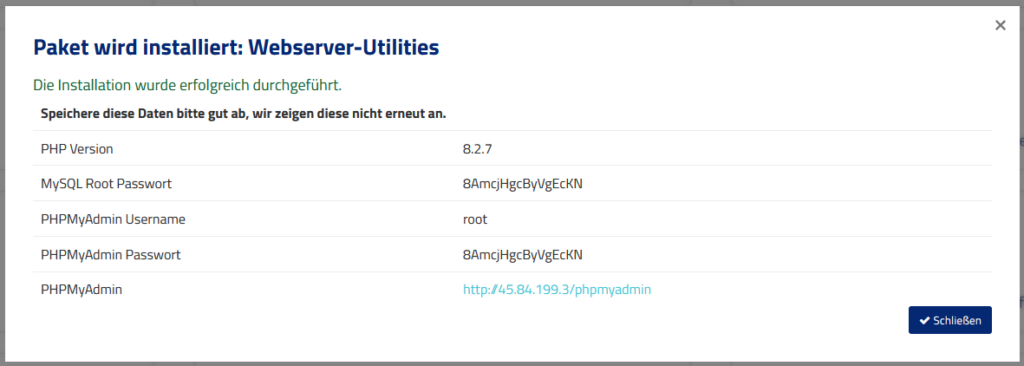
Running Webserver Utilities installation
Now you only have to wait a short time until your installation is finished. You will then be shown all the data you need to access your database.
You can order additional hardware for your server via the customer support. For example, additional hard disks are available if you run out of storage space.
Upon installation, the monthly price plus the set-up fee is due once. The order is only confirmed when the credit is available.
Additional hard disks
You can have us install additional hard disks in your dedicated server. Whether and for how many additional hard disks can be installed varies from server to server. For example, it may be that your server was already delivered with 3 hard disks and the motherboard does not allow any more space for storage media.
Hard disk
monthly
one-time setup
1,92 TB SATA SSD DC Edition
29,40€
10,00€
3,84 TB SATA SSD DCEdition
49,03€
10,00€
2 TB SATA Enterprise HDD
16,78€
10,00€
6 TB SATA Enterprise HDD
21,66€
10,00€
12 TB SATA Enterprise HDD
28,56€
10,00€
If you want to install one or more additional hard disks, contact Support. We will then check what is possible for your server.
With WinMTR we can track what ping you have to your server and what points a ping packet passes between your PC and your server.
This helps us to analyze where a problem with ping or packet loss occurs. Because unreachability is not always a general network problem at our server.
WinMTR Download
Download the program “WinMTR” from here: https://sourceforge.net/projects/winmtr/files/latest/download
Unpack and start
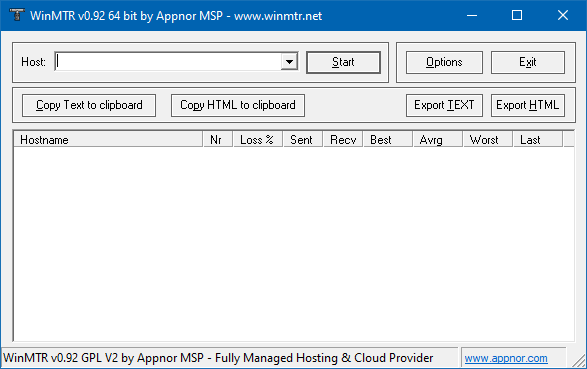
Unpack the ZIP archive on your desktop and open the file WinMTR-v092\WinMTR_x64\WinMTR.exe
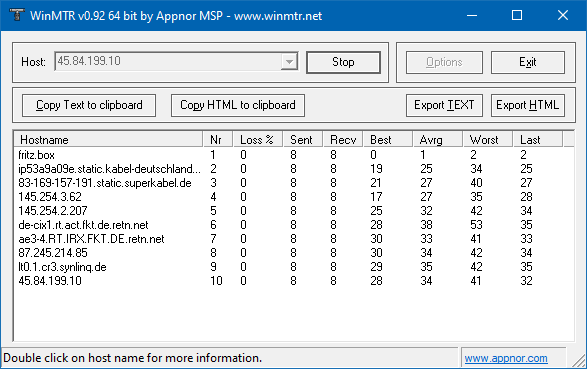
WinMTR
Now find the IP address of your virtual server. Copy it and enter it into the “Host” field. Then click on “Start”.
Now please wait about one minute. The program works now and checks the connection to your server every second by pinging.
WinMTR does its work
After about one minute you can stop the process.
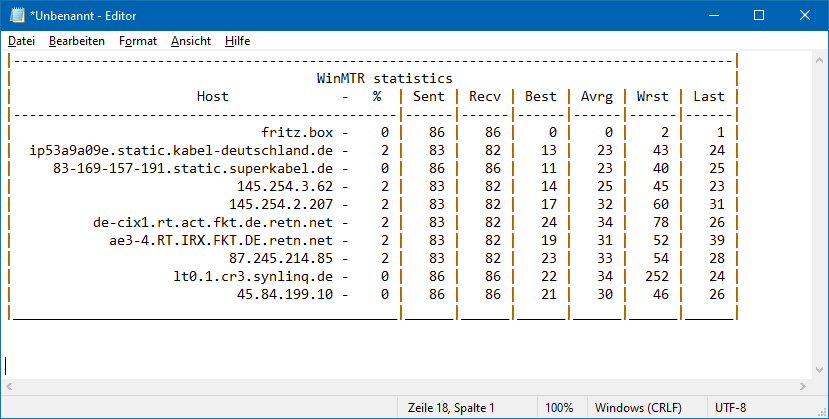
Use the “Copy text to clipboard” function to save the result to your clipboard. Then paste the text into your ticket. If it looks a bit unformatted, that’s not a big deal. We can still evaluate the data.
If Windows is installed on your server, multiple users can work with it at the same time. But for that it’s needed to create a new user and activate the Remote-Desktop service (RDP).
Quick guide
Create user
Set password
unlock this user for RDP
login via RDP
In this article we explain step by step how a new user can use the windows server via remote.
Create a new user
Open the start menu and click on ”settings” – in the following window you click on ”accounts”. Click on ”other users” – there you can find a big ”add” button.
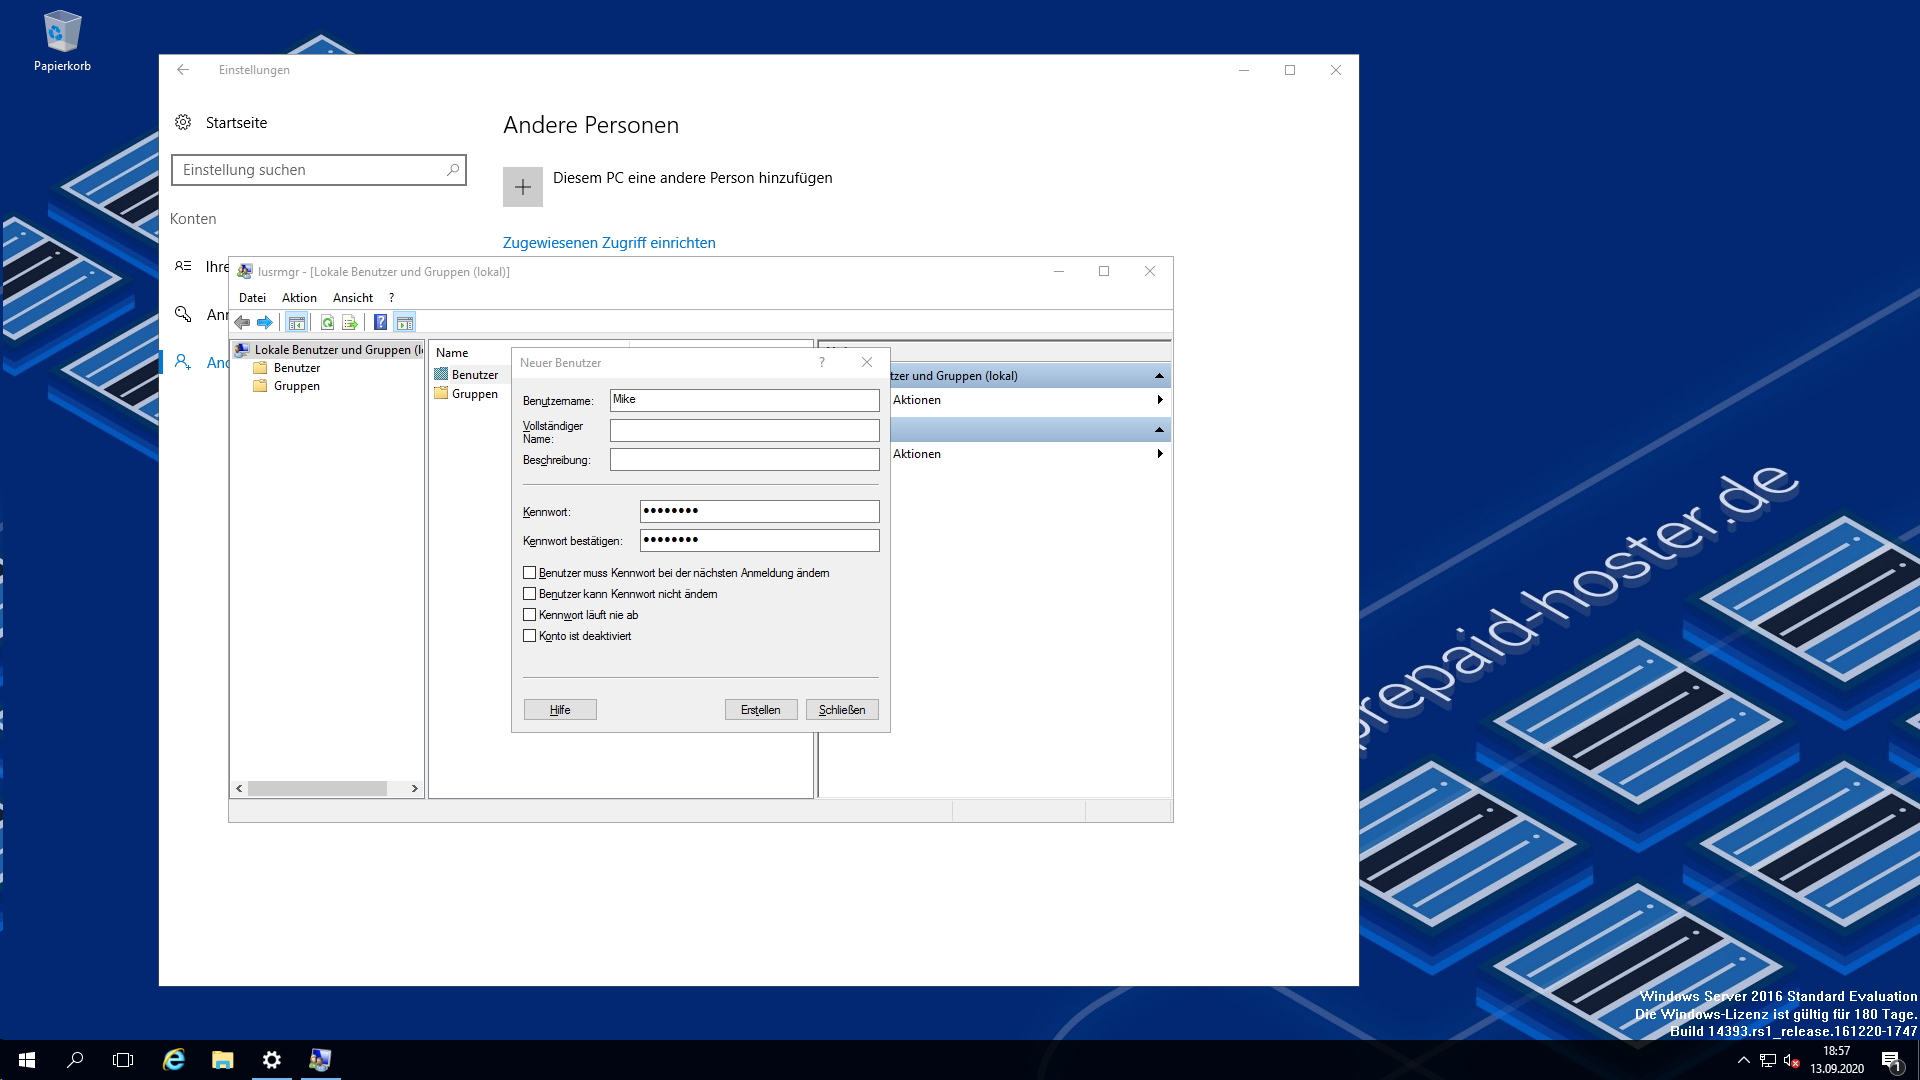
The user management opens. Do a right-click on ”user” and choose ”new user”.
Now you have to fill in the form. It’s important that username and password are set. Other fields can get filled in at will.
Create user (Windows server 2016)
Activate remote desktop for the new user
The new user is registered in the system – so you can now activate the remote desktop.
Do a right click on the windows logo in the bottom left corner of your taskbar. Then click the entry ”system”. In the opening dialogue you choose ”Remotesettings”.
Now we are clicking the ”select users” field. A list of users will appear – the admin is set as unlocked to RDP by default. If we click the ”add” button – a search dialogue opens. In the big field you have to search for the newly created user and click on ”ok”.
Ultimately you have to confirm the upcoming dialogue-fields.
Login via remote desktop
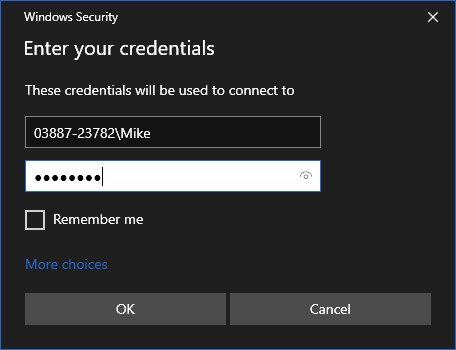
The login is a little tricky because you have to enter the format ”computername/username”. Otherwise the user can’t get identified and the password will be shown as incorrect. You can find the computer name in the ”system” window that is still open. To make it easier note the characters.
Login with the computer- and username
In our case the users full name would be 03887-23782\Mike. If the password you enter is correct – the new user is logged in.
You can order multiple IP addresses for each Dedicated Server through our support. You can order a maximum of 6 individual IPs. Various subnets are also available.
Description
Price
Setup
Per individual IP address
â¬2.50
â¬10.00
/29 IP subnet (8 IPs, 6 usable IPs)
â¬20.00
â¬80.00
/28 IP subnet (16 IPs, 14 usable IPs)
â¬40.00
â¬160.00
/27 IP subnet (32 IPs, 30 usable IPs)
â¬80.00
â¬320.00
One-time setup fee per IP address
–
â¬10.00
Price table IP addresses Dedicated Server
Please note that we need to know the purpose for ordering additional IP addresses. If we consider the purpose to be not meaningful, we may reject the order. This could be the case, for example, if the same result can be achieved through intelligent port usage. Therefore, please include your purpose directly in your support ticket.
A dedicated server can’t be managed as easy as a virtual server. A virtual server is able to start quickly because it is part of a physical system.
Dedicated servers have to support special motherboard-commands so they can get remotely started. Not every motherboard of our dedicated servers are supporting this. That’s why you shouldn’t shut down a dedicated server at all. We may have to send a technician to start the server manually. This can take some time.
If you have shut down your server by accident – feel free to contact our support.