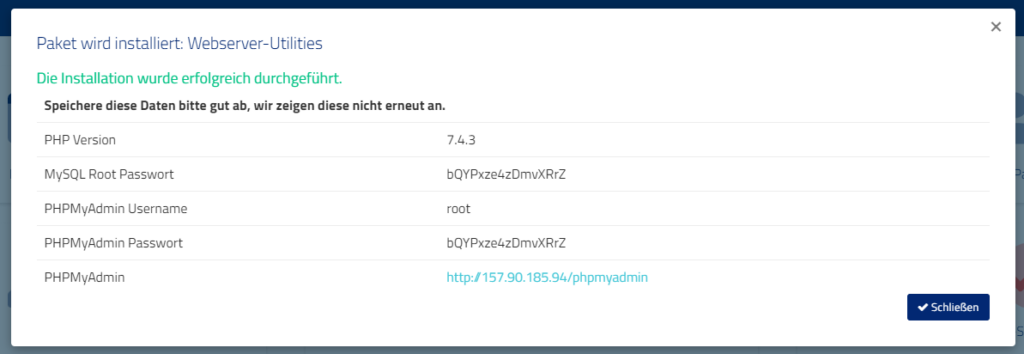
We offer you a convenient and fast way to install a database server in our app installer. You need this for example for game servers, plugins or websites.
For administration you can also install phpMyAdmin automatically.
In the web interface, click on the server on which you want to install a database and open the associated cloud manager.
- Scroll down to the “Actions” box and select “App Installer”.
- Select the “Web Server Utilities” app.
- Select all packages:
- Apache2 for phpMyAdmin
- PHP 7.4 for phpMyAdmin
- MariaDB (database server)
- Choose a MySQL root password
- phpMyAdmin

Click Start installation to start the installation. This process will take 2-3 minutes.
When the process is complete, you will receive login credentials.
We will install the administration interface for your database so that it is accessible at http://IP/phpmyadmin.
The username for the database is “root”.
The access data for the database will be shown to you after the installation. You will also find the MySQL root password on your server in the hidden file /root/.mysql-password.

mysqli_real_connect(): (HY000/1698): Access denied for user ‚localhost’@’localhost‘
If the login to phpMyAdmin does not work, please proceed as follows:
Log in to your server via Putty or similar in SSH and enter the following command:
MYSQL_PWD=$(cat /root/.mysql-password) echo "ALTER USER 'root'@'localhost' IDENTIFIED VIA mysql_native_password USING PASSWORD('$MYSQL_PWD');" | mysql
This will reset the MySQL password again if only socket authentication is available after installation.
If you still have problems or a question, feel free to contact us in support.