In this article, I will show you how to easily change the PHP version for each domain. Versions PHP 8.0 to 8.3 are now available. Version 7.4 is still available for backward compatibility but is no longer recommended.
Changing the PHP Version
Login to the Web Interface: Log in to the web interface (Plesk).
Select Domain: Go to “Domains” and select the website for which you want to change the PHP version.
Adjust PHP Settings: Click on “PHP Settings.”
Select PHP Version: Choose the desired PHP version (8.0 to 8.3).
Save Selection: Click “Ok” to save the new PHP version.
The new setting will be active after about 3 minutes.
FastCGI vs. FPM: What is the Difference?
FastCGI:
Performance: FastCGI offers better performance compared to traditional CGI because it doesn’t start a new process for each request.
Stability: FastCGI processes run isolated, which means they aren’t affected by crashes of other processes.
Usage: Ideal for smaller applications and websites with moderate traffic.
FPM (FastCGI Process Manager):
Performance: FPM further optimizes FastCGI, offering better performance and scalability for PHP applications.
Stability: FPM can manage different pools of PHP processes with various configurations, providing more flexibility and stability.
Usage: Best for large websites and applications with high traffic, requiring efficient resource management.
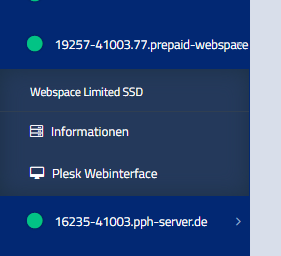
You can reach the Plesk web interface for web hosting at the following address: host04.prepaid-webspace.com.
Log in there with the access data you received by e-mail.
You can also find your access data in the administration web interface at vionity.de. You can easily log in directly to the administration interface from there.
Simply open your web hosting in the left navigation bar and click on the “Plesk Web Interface” button.
You will then be automatically redirected and logged into the correct web interface.
Manage multiple webhostings
If you have ordered more than one web space server from us, please note the following:
The first credentials of your very first web hosting package will always apply to your account in the Plesk panel. This is because all your hosting subscriptions are stored in one Plesk account.
If you have any questions about this or problems with the login, feel free to contact us at Support. We will help you as soon as possible.
In this FAQ article, we provide the data you need to use your mailbox in mail clients. For example, you can set up your mailbox in Outlook or Thunderbird to receive and send emails. These data also apply to various mail clients on Android or iOS.
Beforehand, you should have set up the mailbox in Plesk, as explained here.
To find the necessary data, such as the incoming mail server or outgoing mail server, simply refer to the following table:
Field
Input
Username
Your complete email address
Password
Your mailbox password
Protocol
IMAP or POP3
Incoming mail server IMAP
Your domain Port: 143
Incoming mail server Authentication
STARTTLS
Outgoing mail server SMTP
Your domain Port: 25
Outgoing mail server Authentication
STARTTLS
Outgoing server requires credentials
Yes
Access data for your mailbox
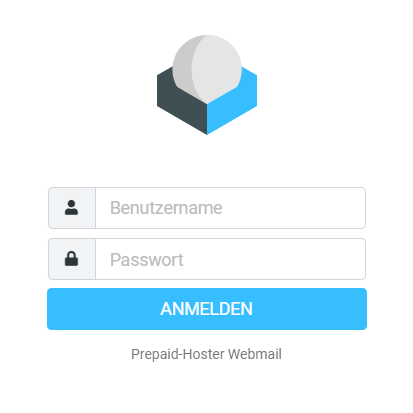
To access emails using a web browser, you can follow the instructions provided here.
If you have any questions about the configuration, feel free to contact us anytime. We will be happy to assist you.
If your server is slow and you can’t work properly with it, you should contact us as soon as possible. While you are waiting for an answer, you can already take action and perform some checks yourself.
First of all you should check in the webinterface how much processor load your server currently has. If your processor is running at peak performance, it is normal that it reacts slowly to further tasks, because something is already keeping it 100% busy.
Workload in the web interface
If you detect high bandwidth, your server may be downloading or synchronizing with something and is therefore limited in the network and cannot work fully. Usually it is enough to wait a few minutes. If this doesn’t help, it is also possible that your server is being abused and carrying out DoS attacks. In this case, our automated security will intervene and block your server and IP in case of any abnormality.
Please also note that your server (unless you have a dedicated or KVM server) is shared hosting. Here you share the physical server hardware with several customers at the same time, which can cause slight limitations at peak times due to overuse of one customer. Also, the Mini vServers do not have quite as much processing power as the Power or High-Line models, as we have throttled the GHz of each virtual core.
If you did not find any abnormalities, it is most likely our fault. In this case, we will of course answer you as soon as possible and solve the problem directly at the root. Please note, however, that we cannot do very much during temporary peaks or large DDoS attacks.
So please be available for questions, should we have to adjust something on your server. You can also reach us on Twitter.
If Windows is not installing on your server and there is no visible progress in the installation, something has gone wrong. But don’t worry!
In most cases, it is sufficient to first install Linux Debian 11.0 on your server reinstall and then try again to install your desired version of Windows.
If that doesn’t work either, please try with a different Windows server version.
An error regarding the license key is displayed
If you see a license key error (product key), please install Windows Server 2019 instead of Windows Server 2022. Your system is not compatible with Windows Server 2022 in this case. Unfortunately, we cannot change that.
These steps didn’t work either!
If nothing works at all, feel free to contact our support. We will take a look at it! But please let us know that you have already tried the steps mentioned above, so that we can resolve the problem for you as quickly as possible.
Please use intelligent port usage to separate your programs from each other or get additional servers to distribute services across multiple IP addresses.
However, you can book up to 4 additional IP addresses for your server. Simply go to the upgrade/downgrade manager of your server. This way, you can, for example, add a second IPv4 address.
After adding the IP address, you will need to stop and restart the server.
However, please note that our gameserver manager always uses the default IP address of your server.