Can I automatically top up my balance?

Yes, you can also automatically top up your balance at Prepaid-Hoster. You have the option to use PayPal or a traditional bank transfer.

With PayPal

You can easily set up automatic balance top-ups through PayPal subscription in the web interface. Here’s how:

  • Sign in to the web interface
  • Open the “Customer Area” menu on the left
  • Click on “PayPal Subscriptions”
  • Click on “New Automatic Payment”
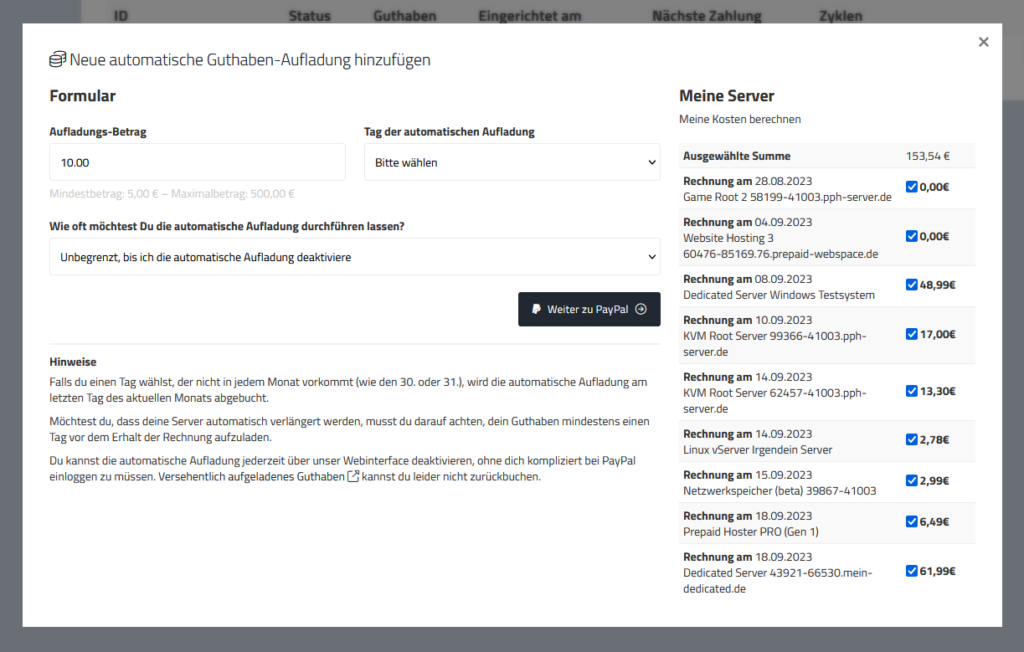
  • Customize the settings according to your preferences. You can activate multiple subscriptions.
  • Authorize the payment through PayPal

Your balance will now be automatically topped up through PayPal.

You can remove the subscription at any time directly in our web interface.

PayPal Subscription settings window

With Standing Order/Bank Transfer

In addition, we offer you the option to automatically top up your balance through your bank account. Simply set up a standing order and transfer the money to our account. You can find the necessary reference in the web interface under “Transactions” > “Set up Standing Order”.

A major advantage of this method is that you can also use the standing order as a regular payment. If you want to ensure that you always have enough balance in your account to use the service, you can set up the standing order to transfer the money automatically.

However, please note that the transfer must be executed 2-3 working days before the invoice date to ensure that the balance is on your account in time. This way, you can ensure that your service runs smoothly and that you don’t accidentally overlook a bill and get interrupted.

If you have any questions, please feel free to contact us at any time.

How do I install WordPress?

Thanks to our web interface you can install Webinterface with a few clicks.

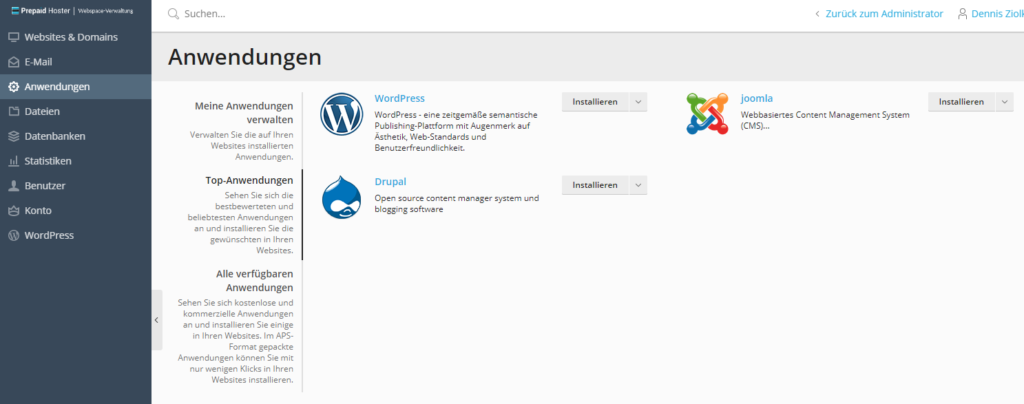
To do so, log in to the web interface at plesk.prepaid-hoster.com. Click on Applications.

Now select WordPress and click on “Install“.

The installation will now be executed.

After the installation you will be redirected to the application overview page. Here you will find all important information about the application and the login data for the respective administration backend.

Where Can I Find phpMyAdmin?

In this article, we explain where you can find phpMyAdmin (database management).

Log in to the web interface (host04.prepaid-hoster.de) and click on “Databases”.

Select the desired database and click on the phpMyAdmin icon. You will now be redirected.


If you have any questions, feel free to contact us.

Which apps can I install via One-Click?

In this article we list for you which well-known and popular software you can install directly in Plesk with a click. This is very easy, no annoying uploading of data necessary. Most apps can even be updated automatically via Plesk.

  • ePages
  • Drupal
  • Joomla
  • Magento
  • Mediawiki
  • Moodle
  • phpBB
  • Prestashop
  • WordPress
Install applications directly in Plesk

I cannot send E-Mails to Outlook/Live/MSN

Unfortunately, Microsoft has put some of our IP address ranges on a block list. For this reason (in particular) no emails can be sent from our web hosting server to recipients with Outlook, Live or MSN domain.

The error message that comes back then looks something like this:

<xyz@outlook.de>: host eur.olc.protection.outlook.com[104.47.14.33] said:
550 5.7.1 Unfortunately, messages from [51.89.85.77] weren't sent. Please
contact your Internet service provider since part of their network is on
our block list (S3140). You can also refer your provider to
http://mail.live.com/mail/troubleshooting.aspx#errors.
[VI1EUR04FT047.eop-eur04.prod.protection.outlook.com] (in reply to MAIL
FROM command)

We have already tried several times to have the IP addresses removed from this list. Unfortunately, Microsoft does not allow any changes here. We are also not given any indication as to what the reason for the blocking is. We are only referred to Guidelines, whose rules we follow as a hosting provider.

We protect the web spaces with strict limits regarding outgoing e-mails. Mass sending of spam is not possible from our web hosting systems. We have also informed Microsoft about this, but they have not responded.

To solve the problem, we are already working on an improved way to increase the delivery quality.

Some customers have already signaled their interest in dedicated IP addresses in the past. However, due to the IP address shortage, it is not possible to allocate dedicated IP addresses to individual customers.

We sincerely apologize for any problems that may have arisen.

How do I get a free SSL certificate for my domain?

In this article we describe how you can create a free Lets Encrypt certificate. You should secure all your domains with an SSL certificate so that the data is always encrypted when transferred over the Internet.

  • Log in to the Plesk web interface.
  • Find the domain you want to secure and click on “SSL/TLS Certificates“.
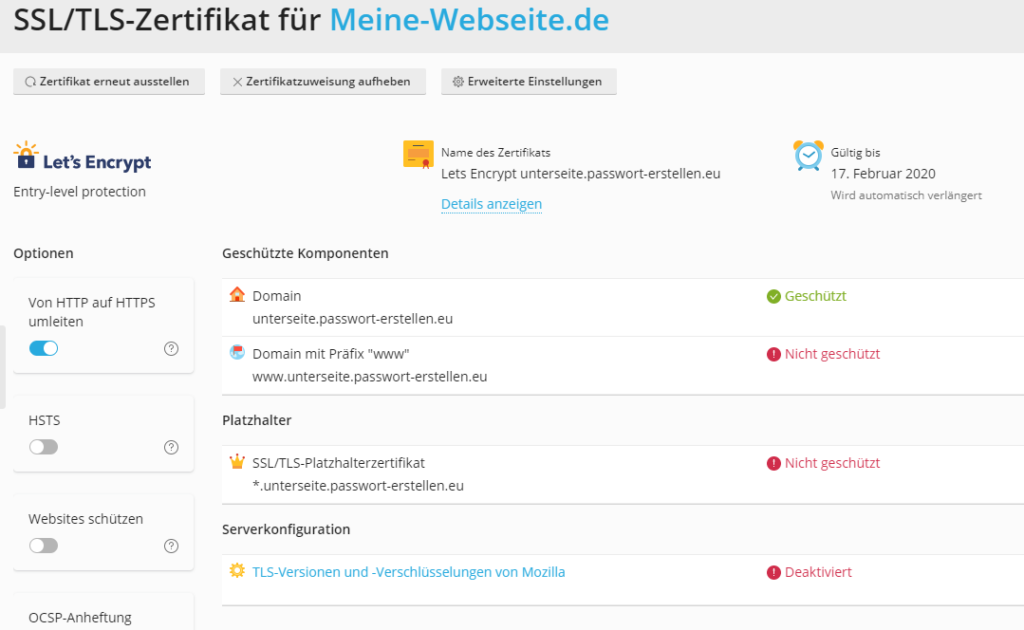
  • Click on “Use for free” to protect the domain with Lets Encrypt.
  • In the dialog that opens, enter your email address and click “Use for free“. The setup may take a few moments.
  • If everything worked, you will get the message “The SSL/TLS certificate has been installed on Meine-Webseite.de“.
Lets Encrypt administration in Plesk

Alternatively, you can request a wildcard Let’s Encrypt certificate that is valid for all subdomains. This way you only have to use one certificate if you use multiple subdomains for one domain.

My Plesk access is not working, what to do?

In this article we describe what you can do if your Plesk access is not working.

You already have another Plesk account

If you have already purchased a Plesk account with your customer account, then you will find every further web space package in this first account. This is also the case if your old web hosting package has been terminated for a longer period of time.

You have forgotten your password

No problem. Just go to the login page of the Plesk web interface and request a new password.

That didn’t help, now what?

No problem! Just log in to the Vionity web interface and write us a support ticket. We will help you quickly and in most cases give you the username and a new password. However, we can only process such a request if it was sent from your customer account.

How Do I Change the PHP Version?

In this article, I will show you how to easily change the PHP version for each domain. Versions PHP 8.0 to 8.3 are now available. Version 7.4 is still available for backward compatibility but is no longer recommended.

Changing the PHP Version

  1. Login to the Web Interface: Log in to the web interface (Plesk).
  2. Select Domain: Go to “Domains” and select the website for which you want to change the PHP version.
  3. Adjust PHP Settings: Click on “PHP Settings.”
  4. Select PHP Version: Choose the desired PHP version (8.0 to 8.3).
  5. Save Selection: Click “Ok” to save the new PHP version.

The new setting will be active after about 3 minutes.


FastCGI vs. FPM: What is the Difference?

  • FastCGI:
    • Performance: FastCGI offers better performance compared to traditional CGI because it doesn’t start a new process for each request.
    • Stability: FastCGI processes run isolated, which means they aren’t affected by crashes of other processes.
    • Usage: Ideal for smaller applications and websites with moderate traffic.
  • FPM (FastCGI Process Manager):
    • Performance: FPM further optimizes FastCGI, offering better performance and scalability for PHP applications.
    • Stability: FPM can manage different pools of PHP processes with various configurations, providing more flexibility and stability.
    • Usage: Best for large websites and applications with high traffic, requiring efficient resource management.

How do I create a Let’s Encrypt certificate for all subdomains?

You can easily create a free certificate in the Plesk web interface, which is also valid for all subdomains. We describe how to do it.

Request Wildcard SSL Certificate

  • Log in to the Plesk web interface
  • In the list, find the domain to which you want to add an SSL certificate.
  • Open the DNS management of the domain in the background. Make sure that the domain is connected to your web hosting.
  • In the Plesk web interface, click on “SSL/TLS Certificates” for your domain.
  • Click on “Issue SSL certificate
  • In the sidebar that opens, select “Install free basic certificate from Let’s Encrypt”.
  • In the window that opens, check “Protect wildcard domain (including www and webmail)”.
  • Click on “Use for free” and wait a moment.
  • A screen with the headline “SSL/TLS wildcard certificate from Let’s Encrypt is issued for domain XYZ” will open.
  • Copy the cryptic looking string, for example “3fOObNS5sZSG4cJa01FOMHJcEyxW8BWCcivQGNNmO6Q” to the clipboard
DNS Challenge string

Configure DNS

  • Open the DNS administration and click on “New entry”.
  • Set:
  • Type: TXT
  • Name: _acme-challenge
  • Content: (your copied string)
  • Save the entry
Enter ACME Challenge in DNS

Install certificate

  • Go back to the Plesk administration interface
  • Click on “Reload” in the dialog and wait a moment
  • The certificate will now be installed and activated for all subdomains

If you have any questions or problems, please contact our support. We will help you then!