No, virtualization (Nested Virtualization) is disabled on our KVM servers.
This means AMD-V or Intel-VT is not available. If you need a virtualized operating system, we recommend getting a Dedicated Server.
Why Do I Need Virtualization?
You can use virtualization to run additional operating systems on your server that work independently from the host machine. Popular technologies for this include Proxmox or Hyper-V, which are not possible on our KVM servers.
Yes, all ports are open on our servers. You have no restrictions. The software firewall (iptables) is set to “ALLOW” by default.
So if you start a program on your Linux server that opens a port publicly, you do not need to explicitly open it. So you don’t need to perform explicit port forwarding, as you might have to do at home, for example.
If your program is not accessible from the outside, first check your firewall. Usually, however, the issue lies with the program’s listening method. If the port is open on “127.0.0.1”, you can only access the port from the machine itself. You would need to either set your own IP address as the “bind” IP or use “0.0.0.0”. This will make your program accessible from the outside.
PHPMyAdmin is a popular web-based open source application designed to manage MySQL databases. It allows users to conveniently manage databases through a web-based graphical user interface (GUI).
You can install phpMyAdmin fully automatically with root access in our web interface on any debian-based Linux.
To do this, go to the Cloud Manager of your server.
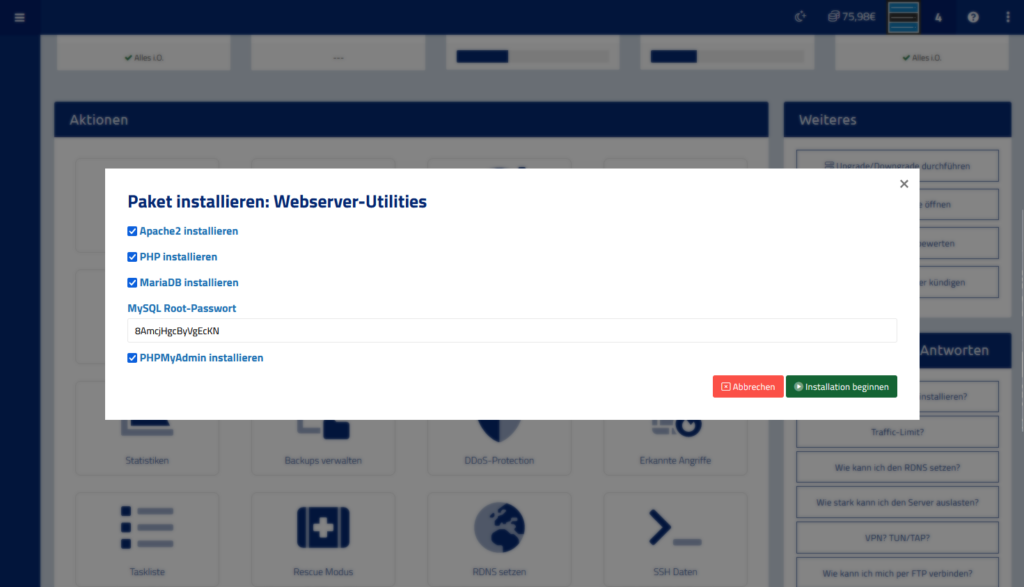
Scroll down to the Actions and select “App Installer”. There you click on the “Web Server Utilities”.
In this dialogue you have to select everything. This is because phpMyAdmin requires a web server (apache2), the PHP script engine and the database software MariaDB/MySQL server.
Then click on Start installation.
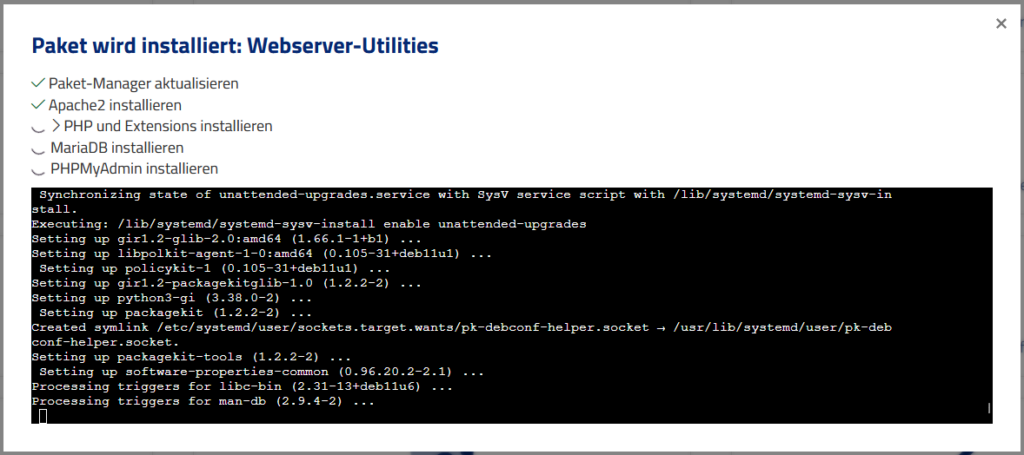
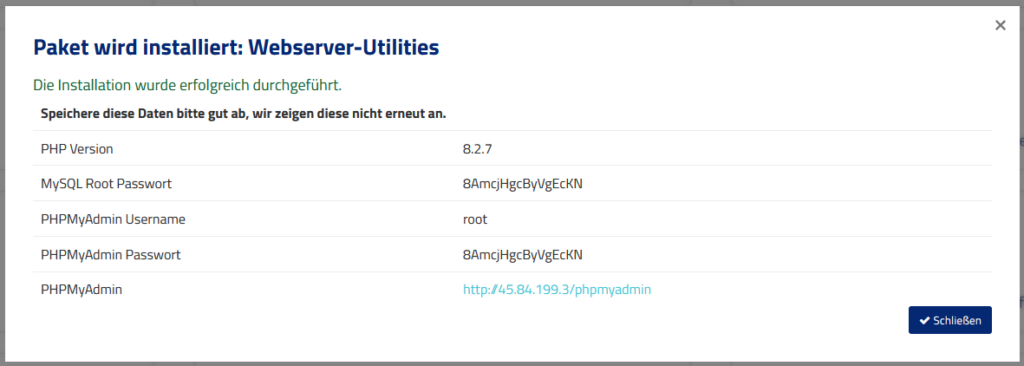
Now you only have to wait a short time until your installation is finished. You will then be shown all the data you need to access your database.
DKIM is an important method for securing email communication and preventing email fraud. In this article we will take a closer look at DKIM, how it works, why it is relevant for your Plesk server and how you can implement it effectively.
When sending and receiving emails through your Plesk-based hosting service, it is essential to ensure the security and authenticity of your emails. Read on to learn more about DKIM and how you can protect your email communications.
Required for many email providers
Mail providers, such as Google’s gmail, no longer accept emails without a valid DKIM. This is how companies proceed to protect their customers from mail spam.
Where can I find the DKIM in Plesk?
Step 1: Log in to Plesk and navigate to your domain. Click on the “Email” tab and then go to the “Email settings”.
Step 2: In the settings, activate the check mark for “Use DKIM spam protection system to sign outgoing e-mail messages”. Then click “Apply”.
Step 3: Click on “Configure external DNS” to get the key information for your DKIM:
You need:
default._domainkey.dezio.dev. IN TXT "v=DKIM1; p=MIGfMA0GCSqGSIb3DQEBAQUAA4GNADCBiQKBgQDJzy799GTmmolxda8Zd+HF18w11Zjs3QiP4R7LvtBTe9saLVvowLoBWjXh3YFMcT7Cs07hAMVPjJdcYeHVaa9k7Yy7m+PXXraVlZKtOjPw8MqhV6zyOI6YQ+k1tzh6cq7Yvj1W/C7HyMMBsiXh4NUNq+ksh9s5k1uCyYYM4uO2WQIDAQAB;"
_domainkey.dezio.dev. IN TXT "o=-"
How do I store the DKIM in the DNS Manager?
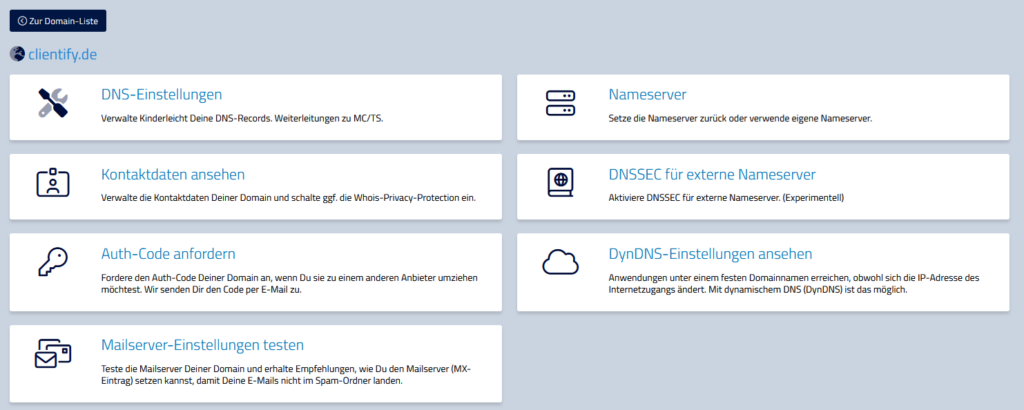
Now open Vionity and search for your domain in the navigation. Click on the corresponding DNS management.
Then click on “+entry”.
Add the default._domainkey key:
Record-Type: TXT
Name: default._domainkey
Content: The key provided by plesk "v=DKIM1; p=MIGfMA0GCSqGSIb3DQEBAQUAA4GNADCBiQKBgQDJzy799GTmmolxda8Zd+HF18w11Zjs3QiP4R7LvtBTe9saLVvowLoBWjXh3YFMcT7Cs07hAMVPjJdcYeHVaa9k7Yy7m+PXXraVlZKtOjPw8MqhV6zyOI6YQ+k1tzh6cq7Yvj1W/C7HyMMBsiXh4NUNq+ksh9s5k1uCyYYM4uO2WQIDAQAB;" (mit Anführungszeichen!)
Save!
Then create the _domainkey:
Record-Type: TXT
Name: _domainkey
Content: "o=-" (mit Anführungszeichen!)
Save!
Your DKIM is now stored. The reliability of your e-mail delivery is now increased. Please note, however, that there may still be problems with sending e-mails, as many other factors play a role.
You can order additional hardware for your server via the customer support. For example, additional hard disks are available if you run out of storage space.
Upon installation, the monthly price plus the set-up fee is due once. The order is only confirmed when the credit is available.
Additional hard disks
You can have us install additional hard disks in your dedicated server. Whether and for how many additional hard disks can be installed varies from server to server. For example, it may be that your server was already delivered with 3 hard disks and the motherboard does not allow any more space for storage media.
Hard disk
monthly
one-time setup
1,92 TB SATA SSD DC Edition
29,40€
10,00€
3,84 TB SATA SSD DCEdition
49,03€
10,00€
2 TB SATA Enterprise HDD
16,78€
10,00€
6 TB SATA Enterprise HDD
21,66€
10,00€
12 TB SATA Enterprise HDD
28,56€
10,00€
If you want to install one or more additional hard disks, contact Support. We will then check what is possible for your server.
Yes, you can change or determine the address on your invoices. If your current address or company name is incorrect, please first change your address in the web interface.
You can also directly specify a VAT ID there. This will be displayed on all subsequent invoices, along with the company name.
Adjust existing invoice
To change the address (including company name and VAT ID) on existing invoices, you need to briefly contact customer support. The address on existing invoices is not automatically changed if you modify it in the web interface due to legal regulations. An employee in the accounting department will take care of that for you.
Please note that we only update the address on top-up invoices. All other invoices have been paid with credit and are not suitable for your own accounting.
To protect your account, you can enable 2-way authentication (2FA) for login in the web interface.
You need a 2FA app, for example Google Authenticator. We support the OTP standard.
First, log in to the web interface.
In the web interface, click on the 3 dots in the upper right corner to open the menu. Then select “Enable 2FA” (2FA aktivieren).
You will be redirected to a page with a QR code on it. You scan it with your favorite app for 2FA codes.
Now enter the first code that is displayed to you. After the verification your account is protected by 2FA and you will be asked for your current code every time you log in to the web interface.
I have lost my phone or cannot access my codes
If you lost your 2FA information, for example, if you lost your cell phone, you don’t have to panic. We can disable your protected access.
Please send us an e-mail to management@prepaid-hoster.de. The email must come from the mailbox of your customer account. Please note that we need to verify the account ownership for your own security. If possible, send us directly the last invoice number you received by email. After that an employee will remove the 2FA protection.
As a website hoster, you may process personal data on behalf of your customers, for example when you host their websites or databases. In this case, it may be necessary for us to enter into a contract for commissioned data processing (ADV) with you.
An ADV is required when a service provider processes personal data on behalf of another company. In order to conclude an ADV, both the client and the processor must ensure that technical and organizational measures are taken to guarantee the security of the data.
Please contact us in support with further details. We will then check whether an ADV is necessary and send you a signed form.
Please note that we need your complete data for this. This is a prerequisite for the contract.
If you change the SSH port of your server, the game server manager can no longer access your server. Because it does not know the new port. Our gameserver manager uses your root access with an SSH key to manage the server and execute scripts (e.g. start/stop).
So you have to adjust the port. This is not that difficult. Just go to the game server overview of your vServer.
Then click on the settings icon in the tile of each game server where you want to change the SSH port.
Then change the SSH port to the SSH port you set. Save.
Now your SSH port is changed and you can continue managing your server!