Dieser Artikel wird nur noch aus Archivgründen online gehalten, da OpenVZ von uns nicht mehr vertrieben wird.
Can I run a VPN server on my server?
Basically, it is okay to run your own VPN server on your vServer. However, there are some restrictions.
Restrictions on virtual servers
In order to continue offering traffic based on the Fair Use principle, we restrict some use cases on our vServers.
VPN can be used under the following conditions:
- Only for private purposes
- The VPN access is only used by yourself and is not publicly operated
- On virtual servers under 10â¬, traffic should remain below 1TB/month
- On all other virtual servers, the total traffic must not exceed 2.5TB/month
To bypass these restrictions, additional traffic can be booked.
What DDoS protection is available?
If you rent a virtual server from Prepaid-Hoster, you have access to various DDoS protection profiles to protect your applications.
If you are experiencing server accessibility issues due to an attack, you can activate permanent protection. Otherwise, your server is in automatic detection mode 24/7. If you believe your server is not being attacked but still not functioning, check here.
We monitor your server traffic around the clock for unwanted disturbances! DDoS protection is included with all virtual servers from Prepaid-Hoster.

Which DDoS protection provider does Prepaid-Hoster use?
We use DDoS protection from SYNLINQ. Arbor Sightline ensures the availability of your server 24/7.
Which profiles are available?
You can view the status of your chosen AntiDDoS profile in the Cloud Manager. This value is an important part of your server, so we display it directly in the Cloud Manager.
- Automatic protection
- General permanent protection
- Minecraft DDoS protection
- TeamSpeak protection
- GTA 5 (Five-M)
- ALT:V
- RAGE:MP
- GTA:SA
- ARK:SE
- Steam games (General)
Notifications for attacks
You will receive an email from us if your server is under attack. You can also find information directly in the web interface.
Are there any disadvantages to DDoS protection?
No, there are no disadvantages. The ping may increase by 1-2 ms when protection is enabled. Other programs on the server may potentially cause false positives.
Can I use multiple profiles at once?
No. You can only choose one profile. If you have a service that requires specific protection, it should be on a separate vServer anyway.
Can I Virtualize on My vServer?
No, virtualization (Nested Virtualization) is disabled on our KVM servers.
This means AMD-V or Intel-VT is not available. If you need a virtualized operating system, we recommend getting a Dedicated Server.
Why Do I Need Virtualization?
You can use virtualization to run additional operating systems on your server that work independently from the host machine. Popular technologies for this include Proxmox or Hyper-V, which are not possible on our KVM servers.
Can I Use Docker?
You don’t need virtualization technology for Docker because it uses containerization. More info about Docker on vServers.
Alternatives: Dedicated Server
If you want to host your own virtual machines, you can use our Dedicated Servers. There you can run virtualization without any restrictions.
Are all ports open?
Yes, all ports are open on our servers. You have no restrictions. The software firewall (iptables) is set to “ALLOW” by default.
So if you start a program on your Linux server that opens a port publicly, you do not need to explicitly open it. So you don’t need to perform explicit port forwarding, as you might have to do at home, for example.
It’s a bit different with Windows servers. There, you need to open the ports in the Windows firewall to be able to reach them from the outside.
My program is not accessible from the outside
If your program is not accessible from the outside, first check your firewall. Usually, however, the issue lies with the program’s listening method. If the port is open on “127.0.0.1”, you can only access the port from the machine itself. You would need to either set your own IP address as the “bind” IP or use “0.0.0.0”. This will make your program accessible from the outside.
We also have a separate article on making a MySQL Server accessible from the outside.
How do I install PHPMyAdmin on my server?
PHPMyAdmin is a popular web-based open source application designed to manage MySQL databases. It allows users to conveniently manage databases through a web-based graphical user interface (GUI).
You can install phpMyAdmin fully automatically with root access in our web interface on any debian-based Linux.
To do this, go to the Cloud Manager of your server.
Scroll down to the Actions and select “App Installer”. There you click on the “Web Server Utilities”.
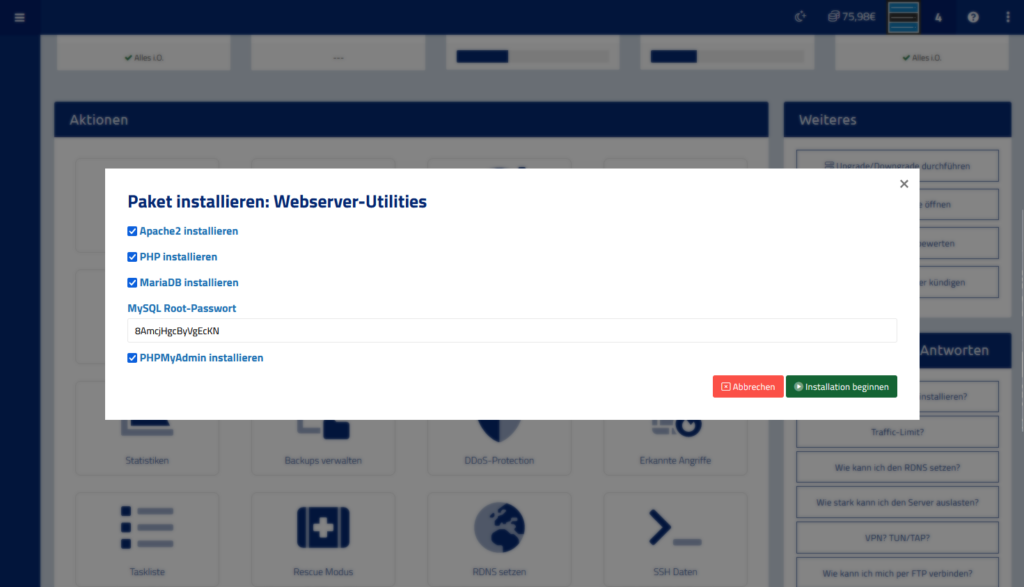
In this dialogue you have to select everything. This is because phpMyAdmin requires a web server (apache2), the PHP script engine and the database software MariaDB/MySQL server.
Then click on Start installation.
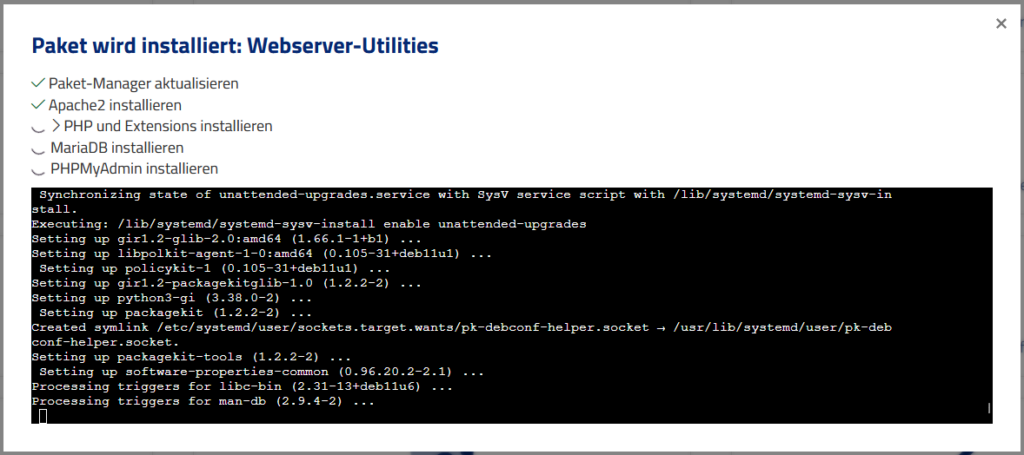
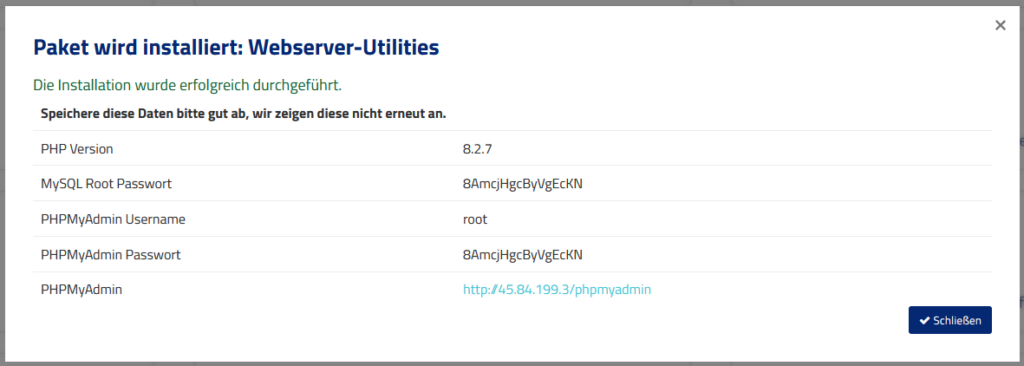
Now you only have to wait a short time until your installation is finished. You will then be shown all the data you need to access your database.
How do I activate Windows Server?
Activate Windows Server and store license – step-by-step guide
Our servers are shipped with a 180 day trial license from Microsoft by default. In order to use the server according to the EULA of Microsoft Windows, you must deposit a Windows license.
To activate Windows Server, it is necessary to have a license key. This must be either Windows Server 2019 Standard or Windows Server 2022 Standard. Depending on which operating system you have installed.
To be able to install the standard license, you have to convert the evaluation version to standard. So you can’t just enter the key in the ProductKey mask. A little command line is needed.
Convert evaluation to standard via CMD
Log in to your Windows server via RDP.
Open the console as administrator. Open the search, type cmd. Right click on the entry and you will get the option to open the console as administrator. Click on it.
Activate Windows with Key
dism /online /set-edition:ServerStandard /productkey:KEY /accepteula
After that, your Windows is activated. If unexpected errors occur, it is best to use an online search to find possible sources of error.
Mailcow Admin Password Reset
Mailcow (Dockerized) Admin Password Reset
If you have installed Mailcow (dockerized) on your server and don’t know your admin login password anymore, you don’t have to worry about your data. You can easily reset the admin password yourself.
Log in to the server via SSH
To reset the password, you must log in to the server via SSH using Putty or similar. Use the root access for this.
Change to the Mailcow directory
Now you need to change to the directory where you installed Mailcow. By default this is /opt/mailcow-dockerized.
cd /opt/mailcow-dockerized
Reset password
Next you can use the script that comes with Mailcow to reset the admin password.
./helper-scripts/mailcow-reset-admin.sh
Run the script. You will be asked if you really want to reset the password. Acknowledge the question with a “Y” or “yes” followed by [Enter].
After that you will see the new password.
root@14640-21671:/opt/mailcow-dockerized# ./helper-scripts/mailcow-reset-admin.sh
Checking MySQL service... OK
Are you sure you want to reset the mailcow administrator account? [y/N] yes

Working, please wait...

Reset credentials:
---
Username: admin
Password: T2Kj9TtM1ZhngAWD
TFA: none
The password was reset
Your password has now been changed to “T2Kj9TtM1ZhngAWD”. You can now log in to Mailcow. Please note that this only changes the administrator password and not your password for SoGo or IMAP/SMTP logins.
My kernel is outdated – What now?
By default, OpenVZ virtual servers use an older kernel (version 3.10) which still receives security updates but may not offer all the features of newer kernels. Please note that in OpenVZ virtual servers, the kernel is shared with all other virtual servers on the host system, so we cannot make changes to the kernel on an individual basis.
Using KVM servers
If you need a newer kernel, you should consider switching to a KVM server. KVM (Kernel-based Virtual Machine) is a virtualization technology that allows you to install your own kernel on your server. This gives you the opportunity to use a newer kernel that may offer better features and compatibility with specific applications. However, please note that switching to a KVM server may incur additional costs, as KVM servers are generally more expensive than OpenVZ servers.
Using an older kernel
Checking the required features
If you do not need specific features provided by a newer kernel, it may not be necessary to update the kernel. Please check the requirements of your applications and services to determine if a newer kernel is really necessary.
If you have any further questions or concerns regarding the kernel version on your virtual server, please feel free to contact our customer support. We are happy to assist you in selecting the right option for your needs.
How do I install the Guest Agent?
Problem solution: Install Guest Agent on KVM server
It can happen that the Guest Agent was not installed correctly after setting up your server. This is responsible for the connection between your server and Vionity.
You can install the Guest Agent by logging into your server via SSH.
wget -qO /tmp/guest-agent.sh https://pph.sh/kvm-install.sh
/bin/bash /tmp/guest-agent.sh
Your server will now install the Guest Agent. After that you should be able to access the server via Vionity.
If you have problems, the server is not accessible via SSH or you do not feel up to the task, you can contact our support. We will take care of it for you as soon as possible.
What is the Guest Agent used for on a KVM server?
On a KVM server, the Guest Agent is used to collect data about the VMs running on the server. This data is then used to provide users with information about the status and performance of the VMs via the KVM server’s web interface.
The data that the Guest Agent collects can include information about CPU utilization, memory usage, network activity, and other important performance parameters. By making this information available through the web interface, KVM server users can monitor VM performance and detect problems early.