Each KVM server can activate the backup function free of charge.
You can choose whether you want to create automatic or manual backups.
Between 2 and 5 slots are available to you free of charge.

Each KVM server can activate the backup function free of charge.
You can choose whether you want to create automatic or manual backups.
Between 2 and 5 slots are available to you free of charge.

If your server is suddenly no longer online, this can have many reasons.
If there is a failure in our infrastructure, we will announce it as soon as possible on status.prepaid-hoster.de.
Then our rules for goodwill and warranty apply.
With Sinusbot you can listen to music on your TeamSpeak or Discord server quickly and easily. The bot connects to your voice channel and offers a variety of features.
You can install the Sinusbot via the App Installer in the Cloud Manager. We will show you how to do that in this article.
First, of course, you need a virtual server. It doesn’t matter if you have rented an OpenVZ cloud server or a KVM root server. You can only install a database via the web interface if you have a Linux operating system on your server.
Go to the Cloud Manager of your server and scroll down. There you will find the action “App Installer“. We use this to install software on your server.
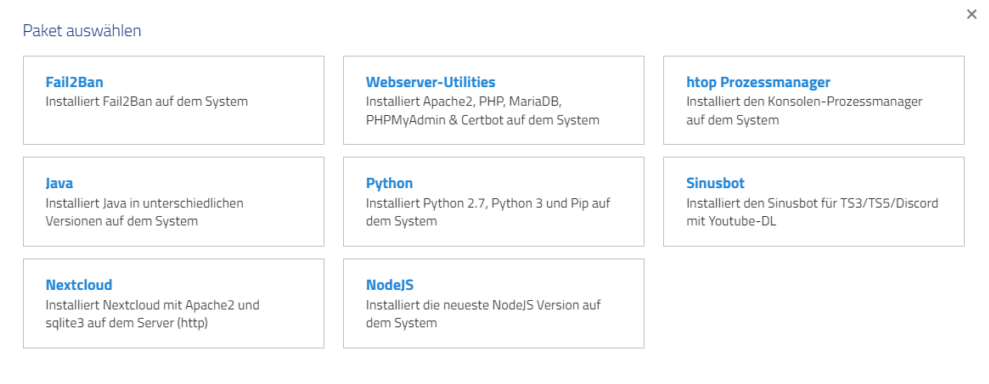
After opening the app installer, click on the Sinusbot tile.

For a regular workflow we recommend to install YoutubeDL and to register the Sinusbot as a service. This way you can start and stop it later using service sinusbot start/stop.
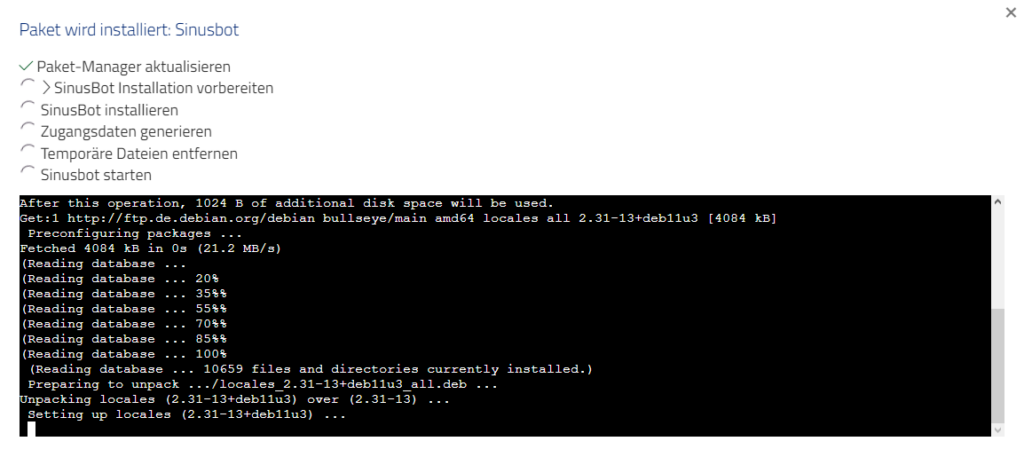
By clicking on start installation the desired software package will be installed on your server. Wait a moment until the process is finished.
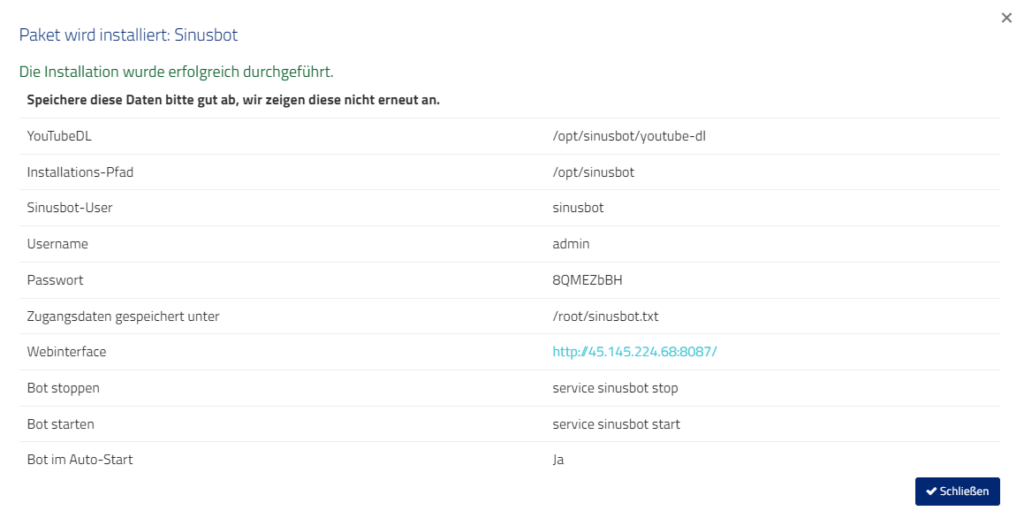
In the final dialog you will find all information about the installation of the Sinusbot. Save this data well. You can also find the information under /root/sinusbot.txt.
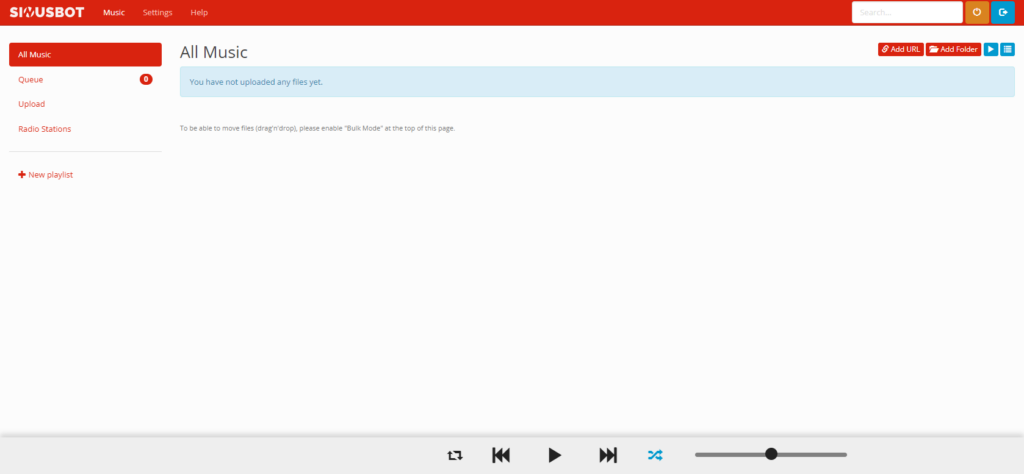
The Sinusbot is currently You can find the login mask at http://[IP]:8087/. There you can login with the username admin and the generated password.
It can sometimes happen that something is wrong with the system time on the server or that you want to change it for various reasons.
All of this can be easily controlled using an SSH program like Putty.
First and foremost, it is important to check if the current minute in the system time is correct. It can happen that the time on one of our host systems is not accurate. In such cases, our support team can adjust it upon request. Usually, our host systems automatically synchronize the time daily.
Instructions: Connect to your server using SSH. You can use Putty, for example. All you need is the IP address of your server, possibly (if changed) the port, and the root password. In this case, use the username “root”. Now, enter “date” to check the system time. After confirming the entry, the system time should be displayed. Compare it with the current time to see if any adjustments need to be made. If the system time is incorrect, please contact our support team for assistance. If everything is correct and only the time zone is wrong, proceed as follows:
Enter “dpkg-reconfigure tzdata“. A selection field will appear. Choose “Europe” first and then “Berlin” for the German time zone. The time zone is now changed. It is recommended to double-check by entering “date” to ensure everything is correct.
Enter “cp /usr/share/zoneinfo/Europe/Berlin /etc/localtime” and confirm. The time zone is now corrected. If you want to set a different time zone, adjust the input accordingly.
If your server doesn’t have enough performance for your needs, don’t worry. You can easily add more cores or RAM through our web interface with just a click, which will be a paid upgrade. If you later find that the server is too powerful, you can reduce the resources again and downgrade. We prioritize maximum flexibility and are always here to help you.
Where Can I Find the Upgrade/Downgrade Form?
First, click on “Conditions & Configuration” for the desired server in the web interface. Then open the change management section. Now select “Upgrade/Downgrade.”
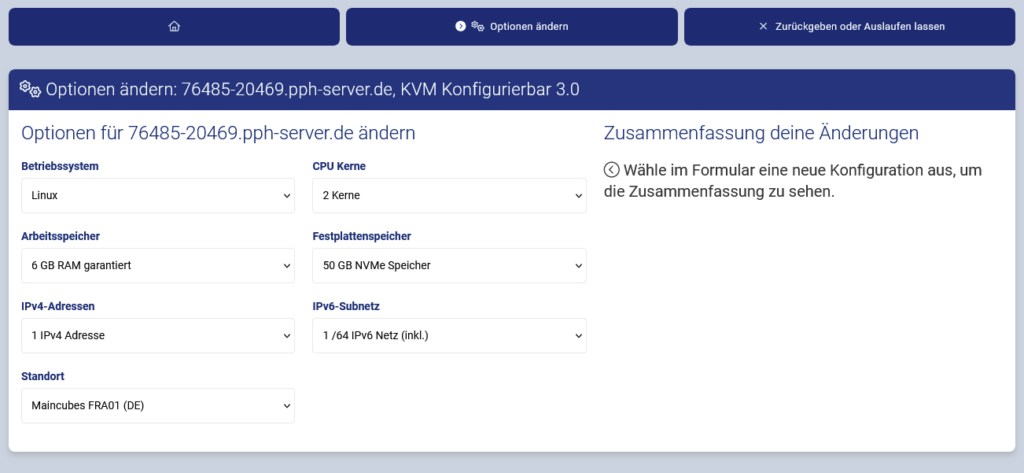
Note: Different server series have specific rules for the upgrade/downgrade process.
For an upgrade, you only need to pay the amount due for your remaining term, keeping the billing fair. For a downgrade, we will immediately credit the remaining balance to your account.
On our OpenVZ servers, you cannot install a kernel. This is due to the virtualization method, as the containers use the host system’s kernel. If you have an outdated kernel and need more information, you can find it here.
On our KVM servers, you are free to use any kernel you want. KVM utilizes full virtualization.
With our OpenVZ vServers (not to be confused with the KVM servers) you rent virtual cores that you share with other customers. Of course, they get a lot of work when you install, start and use some programs on your vServer. We check the load average to see if your server is overloaded. You can see the load of your server with the command “uptime“. We take the average of the last three numbers to calculate your load.
root@01234-56789:/# uptime
17:26:25 up 5 days, 21:13, 1 user, load average: 25.20, 24.23, 22.45
We have internally established the rule that describes the maximum allowed load of: 1.25 * number of cores booked
| Cores | Max. Load |
| 1 Core | 1,25 |
| 2 Cores | 2,5 |
| 4 Cores | 6 |
| 6 Cores | 7,5 |
| 8 Cores | 10 |
We have integrated an automatism that cyclically monitors the average load of all virtual servers. We will lock your server if this automatism detects an overload 10x in a week. This ensures that no one overloads the host system and all customers can experience optimal service.
If your server is blocked, we will ask you for a statement. You will then have the following options:
If you are not sure what is causing such a high load on your server, our support will be happy to help you.
Please note that during peak times (Friday evenings, weekends, holidays) everyone uses their vServer. Excessive load on one virtual server sometimes causes all other servers to react slower. Stay fair and try not to drive up the load on your server unnecessarily.
If you do not agree with this rule, we unfortunately have to terminate the prepaid relationship according to §7.2 (You are obliged to design your domain and the content accessible under it in such a way that an excessive load on our servers […] is avoided).
Is your download crawling like a snail, or does your deployment pipeline seem to take forever? This guide explains why this happens and how to get back up to speed quickly.
Find out the maximum bandwidth available in each server plan. The port speed represents the highest possible speed your virtual server can reach.
| Plan | Maximum Port Speed |
|---|---|
| Configurable vServer | up to 2 Gbit/s |
| Smart Value & Smart Essential | up to 1 Gbit/s |
To clear up any past confusion, here is the difference between Gbit/s and GB/s.
| Unit | Means ⦠| Quick Formula |
|---|---|---|
| Gbit/s | Gigabits per second (bit measurement) | 1 Gbit/s â 0.125 GB/s |
| GB/s | Gigabytes per second (byte measurement) | 1 GB/s = 8 Gbit/s |
1 Byte equals 8 Bits. So if your monitoring shows 1 Gbit/s, that is about 125 MB/s â not 1 Gigabyte per second.
Every virtual server starts with 1 Gbit/s of symmetrical bandwidth â for both upload and download.
This speed is more than enough for:
In rare cases, there might be an issue. Just contact our support team â we will check the problem and talk with you about the next steps.
600 Mbit/s ÷ 8 = 75 MB/s
If you see 75 MB/s during a speed test, it means you are using 600 Mbit/s â which is well within the “up to 1 Gbit/s” range.
We are happy to help if you’re having trouble with download or upload speeds. It is always useful if you send us your speed test results â just make sure to use a good test location (in Germany).
Yes, you can use your own ISO files to install operating systems with Prepaid-Hoster. You can either choose from a list of our ISO files or provide your own. There are no costs involved, and the storage for the installation is free. To do this, you need to first enable the ISO functionality in the expert settings in the VCP settings.
To enable the ISO function for your server, you first need to log into Vionity and then:

Please note, we can only offer a basic web interface if you do not install a guest agent.
Attention: This function is only available for KVM servers (configurable and package). It is technically not possible with OpenVZ servers.
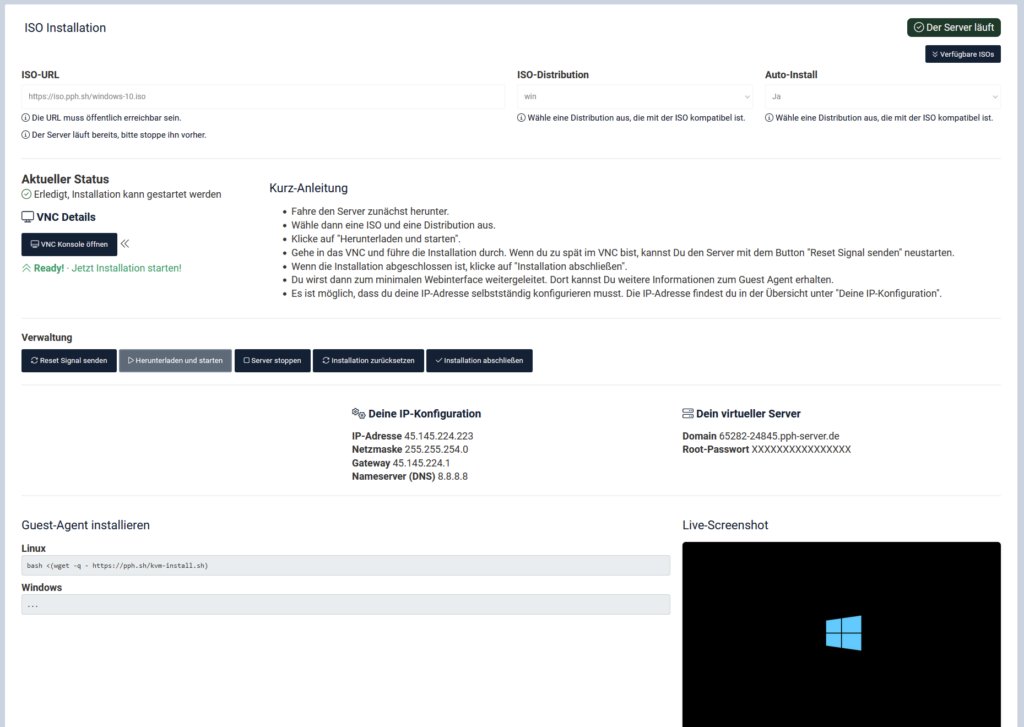
If you have not set up a server using an ISO before, it might be better to use a predefined operating system template. We only offer basic support for installing ISO files.
To use your own ISO file, you need an HTTP link. Vionity will download this file and attach it to your server.
We offer the following ISO files on our web interface that can be installed on KVM servers:
windows-10.iso
windows-win-2016.iso
windows-win-2019.iso
windows-win-2022.iso
ubuntu-18.04-mini-amd64.iso
ubuntu-18.04.5-server-amd64.iso
ubuntu-20.04.1-legacy-server-amd64.iso
ubuntu-20.04.6-live-server-amd64.iso
ubuntu-22.04.2-live-server-amd64.iso
ubuntu-23.04-live-server-amd64.iso
proxmox-backup-server_2.0-1.iso
proxmox-ve_7.1-1.iso
proxmox-ve_7.2-1.iso
proxmox-ve_7.4-1.iso
proxmox-ve_8.0-2.iso
pfSense-CE-2.6.0-RELEASE-amd64.iso
jammy-live-server-amd64.iso
focal-live-server-amd64.iso
debian-10.13.0-amd64-netinst.iso
debian-11.7.0-amd64-netinst.iso
debian-12.0.0-amd64-netinst.iso
debian-9.13.0-amd64-netinst.iso
Zorin-OS-16.3-Core-64-bit.iso
Rocky-8.8-aarch64-boot.iso
Rocky-8.8-x86_64-boot.iso
Rocky-9.2-aarch64-boot.iso
Rocky-9.2-x86_64-boot.iso
OPNsense-22.7-OpenSSL-dvd-amd64.iso
OPNsense-23.1-OpenSSL-dvd-amd64.iso
Fedora-Server-netinst-aarch64-37-1.7.iso
Fedora-Server-netinst-aarch64-38-1.6.iso
Fedora-Server-netinst-x86_64-37-1.7.iso
Fedora-Server-netinst-x86_64-38-1.6.iso
CentOS-7-aarch64-NetInstall-2009.iso
CentOS-7-x86_64-NetInstall-2003.iso
CentOS-7-x86_64-NetInstall-2009.iso
CentOS-8.5.2111-x86_64-boot.iso
CentOS-Stream-8-20230710.0-aarch64-boot.iso
CentOS-Stream-8-aarch64-20220513-boot.iso
CentOS-Stream-8-x86_64-20220506-boot.iso
CentOS-Stream-9-20230410.0-aarch64-boot.iso
CentOS-Stream-9-20230410.0-x86_64-boot.iso
AlmaLinux-8.8-aarch64-boot.iso
AlmaLinux-8.8-x86_64-boot.iso
AlmaLinux-9.2-aarch64-boot.iso
AlmaLinux-9.2-x86_64-boot.iso
When you try to change the resources to your KVM server via the web interface, we always check in the background immediately and automatically whether the desired performance is available. We always need to provide enough performance buffers so that all customers can access their guaranteed performance.
It is important to us that our KVM server host systems are not overbooked. This is essential to maintain the quality. Only this way we can keep the quality in a good condition.
If your upgrade is not available due to technical limits, you will have to wait a while. This message means that an upgrade would lead to overbooking of the host system.
In such a case we cannot perform the upgrade for you.
As soon as the resources become free due to cancellations or expiration of servers of other customers, you can perform the upgrade.
If you need the upgrade immediately, you may be able to rent a new KVM server. This will then be automatically created on a host that has sufficient resources available. Please check beforehand if KVM servers are in stock. You will be informed about this in the order process.
Please note that KVM server hard disk space cannot be downgraded under any circumstances. This is due to technical conditions of the virtual hard disk.
If you have any questions about this, please contact our support team.