How to install Valheim Plus

In this article, we will show you how to quickly and easily install Valheim Plus with your Gameserver Manager.

First, please create a normal Valheim server. Please wait for the installation to complete. Start the server once to create all the necessary files.

Installing Valheim Plus is then quite simple:

  • Stop the server
  • Download the file UnixServer.zip from https://github.com/valheimPlus/ValheimPlus/releases/
  • Extract the contents of the ZIP folder somewhere on your computer
  • Upload the extracted files to your server’s /serverfiles folder using FTP
  • In the settings, specify “./start_server_bepinex.sh” as the start file
  • Start the server again. Valheim Plus is now installed.

Please note: In order for all your friends to connect to this server, the Plus Mod must also be installed on the client. Please use the WindowsClient.zip for that.

How do I change the Minecraft server version?

This article is for Minecraft servers.

You can use your own server versions with the Game Server Manager. By default, the latest vanilla server version is installed.

First you need the JAR file of the server you want to use. You can find the different Vanilla/Spigot/Bukkit & Forge servers at the following links:

When you have found the right file, you can proceed.

  • Make sure that your game server is stopped.
  • Log into your game server via FTP.
  • Go to the /serverfiles folder.
  • Delete all worlds here, if any, to make your server work. Old worlds may not be compatible with your new Minecraft version. You can also keep the server.properties.
  • Upload the jar file via FTP. Wait until the process is completely finished (image 1)
  • Go to the “Settings” tab in the Game Server Manager.
  • In the “The Minecraft Server Filename” field, specify the name of the jar file you uploaded. Attention: Do not specify the extension “.jar”. (Image 2)
Image 1: spigot-1.15.2 from getbukkit.org
Figure 2: spigot-1.15.2 as startup file

Now you can start your server. The startup process may take a while.

Install Modpack

To use a modpack with the Gameserver Manager, please proceed as follows:

  • Upload the complete modpack and specify the correct .JAR file in the configuration. For most modpack servers, this is a file named “forge“. If no .JAR file can be found, the modpack is not compatible with GS Manager.
  • Possibly the server must be started once via a start.bat on the own computer at home. Then upload the entire content completely via FTP.
  • Most modpacks require Java version 1.8. Change it according to our instructions.

If the server does not start, please create a problem-report.
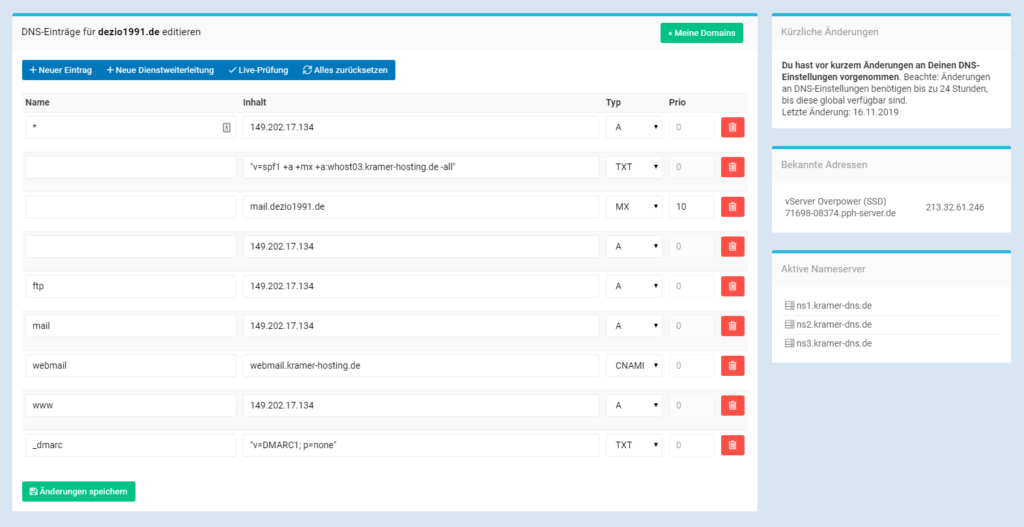
How do I create a subdomain with a different IP address?

If you own a domain at Prepaid-Hoster, you automatically have a DNS manager in the web interface. This gives you the possibility to point your domain(s) to certain IP addresses. Open the desired domain in the navigation. To get to the DNS Manager, click on DNS Settings.

Now you can view and manage the different DNS records.

If you now want to set up a new subdomain, proceed as follows in the DNS Manager:

  • Click + New entry.
  • In the name you enter the subdomain identifier. You do not need to append your domain name.
  • In the content you now enter the desired IP address.
  • Leave A as the type, unless it is an IPv6 address. Then you select AAAA there.

To save the changes, click on “Save”. You can create more subdomains of this type almost endlessly.

Please note that it can take up to 24 hours before the DNS record actually works.

Dieses Bild hat ein leeres Alt-Attribut. Der Dateiname ist image-7-1024x527.png
DNS Manager in the web interface

Windows Server: Quick Start Guide

You have rented a KVM Server with Windows and want to get started right away? Understandable!

First of all, congratulations on ordering your Windows KVM Server. That was definitely the right choice!

We will take you through the steps to get your server up and running.

Your KVM Server comes with Linux by default. But don’t worry! Setting it up for Windows is straightforward, and we are here to help. You already have everything you need, so let’s get started.

Order a Windows KVM vServer

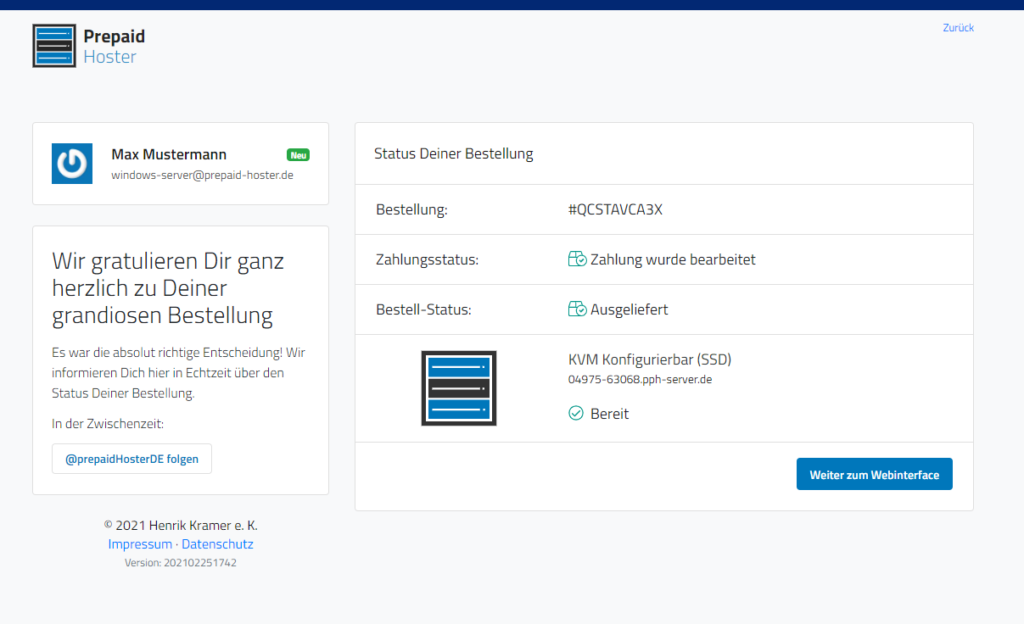
After placing your order, wait a few seconds and then click the “Proceed to Web Interface” button. If not, log in to the web interface at www.vionity.de using your credentials.

Order a Windows KVM Server

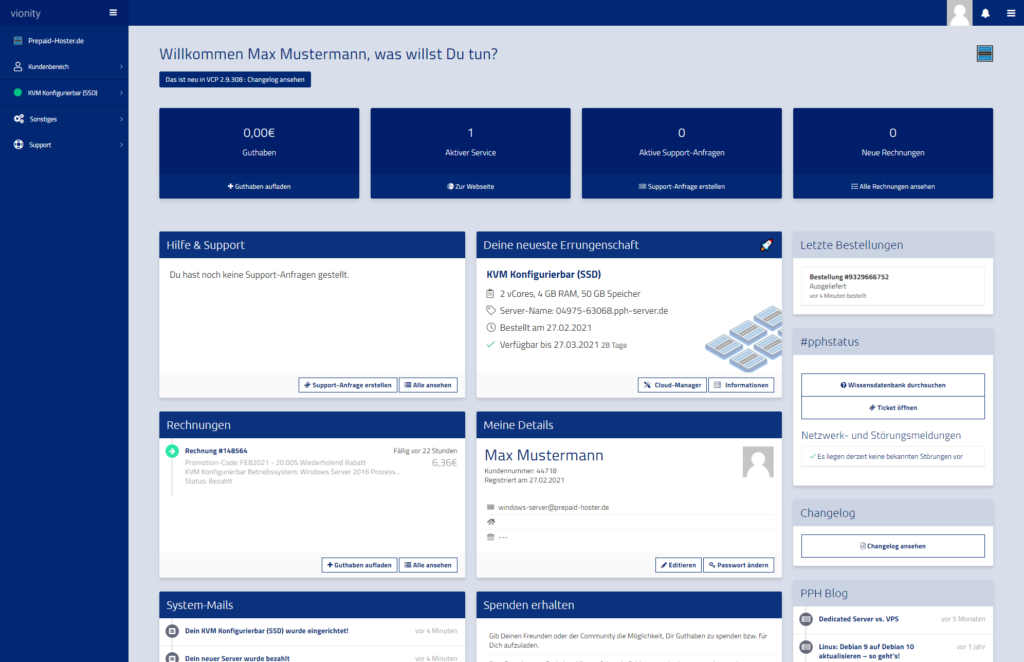
Once the web interface has loaded, you will see all important information at a glance. Take a moment to review the data on the home page.

Dashboard of our Web Interface “VionityCP”

Ready to continue? In the middle of the screen, you should see the card “Your latest acquisition”. If not, the order might still be processing. You can find order information on the right-hand side under “Recent Orders” and via the ticket support.

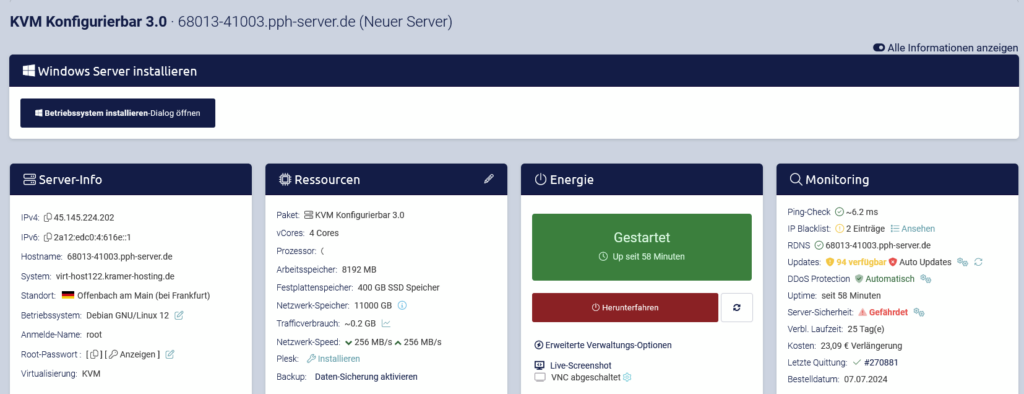
Click on “Cloud Manager” at the bottom of the “Your latest acquisition” card. The web interface will now load all the information about the KVM Server, which may take a moment.

Cloud Manager for Windows Server

The first step is done. You are now in the management (Cloud Manager) for virtual servers.

Install Windows Server 2019

Let’s begin: To install Windows, look at the large box in the upper left corner of the Cloud Manager. Click on

Connecting domain with TeamSpeak

If you want to use your domain to connect to a TeamSpeak 3 server, just follow these steps:

  • Log in to the web interface and select your domain from the navigation menu on the left.
  • Select DNS settings.
  • Click on the + New SRV entry button
  • Now select TeamSpeak as service
  • Fill in the fields:
    • For Subdomain, enter either nothing, or a subdomain that you want to use. Leave it empty to be able to connect to your domain without any prefixed subdomain.
    • IP: Enter the address (domain or IP) of the TS3 server. Important: Without port specification.
    • Destination port: Specify the port of the TS3 server. Default: 9987
  • Save the form.

It can now take up to 24 hours until the DNS entry works. Please contact our support if it does not work. We will be happy to help you.

Create TeamSpeak SRV entry

My Domain Was Deleted. What Now?

If your domain expires or the related service ends, we will release the domain for deletion. Domains are usually paid for one year in advance. Once the year is over and the invoice hasn’t been paid on time, the domain gets deleted. This means you did not renew the domain.

Free Domains with Specific Services

With some of our services, you receive a free domain. If this service is canceled or not renewed, the free domain associated with it will also be deleted. If you want to keep the domain, you can request a restoration. However, note that this comes with additional costs – known as restore fees.

Restore Fees Overview

The fees to restore a deleted domain are set by the respective registry and can vary. Here are some examples:

  • .DE Domain: 21.99 Euro
  • .EU Domain: 70.99 Euro
  • .COM Domain: 123.99 Euro
  • .TV Domain: 123.99 Euro
  • .XYZ Domain: 123.99 Euro

You can request more prices from our support team.

Special Offers for Unlawful Deletion

If your domain was unlawfully deleted, we reserve the right to offer you a special deal. Since restore fees are quite high, we usually provide two domains for free to compensate for the loss. If you still prefer restoring the original domain, we will find a solution together.

Next Steps if Interested in the Domain

If you are still interested in the deleted domain, you can request a restoration through our support. The fees will include both the restore and renewal costs.

Avoid unnecessary costs by paying your invoices on time and renewing your services promptly when needed.

Can I have a domain name changed afterwards?

We have now already received in the support of the frequent questions, whether one could not change the domain xyz.de rented a few weeks ago to abc.de. For technical reasons this is not possible! A domain is registered by us for a whole year at the respective registry for the customer. Although it is usually possible to change the owner data and configurations of the domain at any time, it is not possible to change the domain name itself.

If you can’t do anything with the old domain within the booked year, you have to order a new domain for the full price.

Transfer Your Existing Domain to Prepaid-Hoster.de

Do you already have a domain with another provider and want to transfer it to Prepaid-Hoster.de to use all our domain management features or just keep everything in one place? It’s easy!

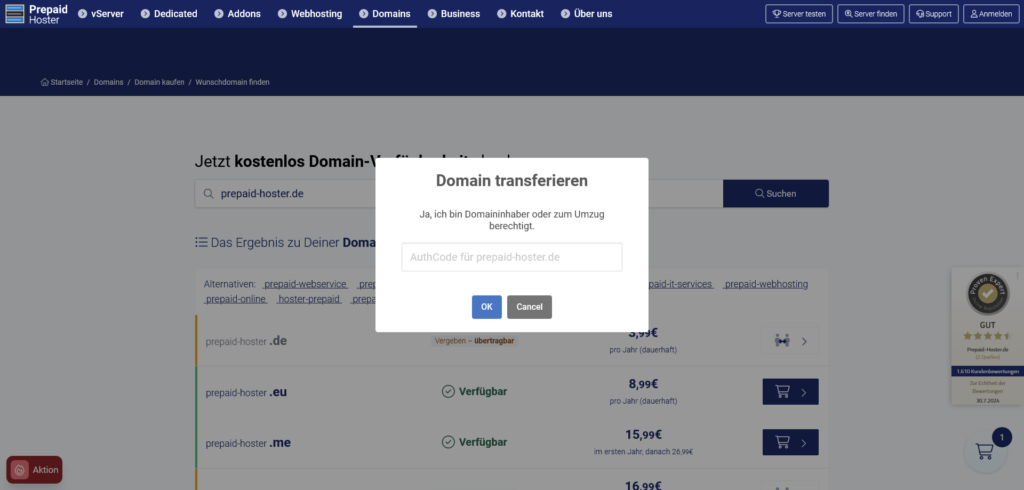
Go to the Domain Rental page and type your existing domain into the big domain checker at the top. After a short synchronization, the system will tell you that the domain is already registered and can only be transferred with an “Auth-Code”.

The Auth-Code is like a password needed to transfer a domain from one place to another. This protects your domain from being stolen by someone else. You need to generate this Auth-Code. Your current provider might have an online function for this, or you might need to contact them. At Prepaid-Hoster.de, you can request the Auth-Code easily with a click.

Once you have your Auth-Code, you can enter it after clicking on “Configure Transfer”. After confirmation, you will see all the details on the right side. If everything is correct, you can add the domain with the Auth-Code to your cart.

Please Note the Following

  • Just like ordering a new domain, you need to provide your address and phone number in the customer area. This is required by the domain registration authorities. If you want to protect your address details in the public Whois, please contact Prepaid-Hoster.de support, and we will discuss the options with you.
  • No matter how long your domain is still valid with your current provider, you will have to pay the yearly fee for the domain extension again, and the domain will be renewed for a full 12 months with us. We cannot transfer the remaining time from your old provider, even if the registrar supports it.
  • Double-check your Auth-Code. It usually consists of a long combination of letters, numbers, and sometimes special characters. Do not enter a fake code; otherwise, your order will be canceled, and you will need to contact support for the next steps.
  • Also, double-check your domain name.

How do I create a WinMTR log?

With WinMTR we can track what ping you have to your server and what points a ping packet passes between your PC and your server.

This helps us to analyze where a problem with ping or packet loss occurs. Because unreachability is not always a general network problem at our server.

WinMTR Download

Download the program “WinMTR” from here: https://sourceforge.net/projects/winmtr/files/latest/download

Unpack and start

Unpack the ZIP archive on your desktop and open the file WinMTR-v092\WinMTR_x64\WinMTR.exe

WinMTR

Now find the IP address of your virtual server. Copy it and enter it into the “Host” field. Then click on “Start”.

Now please wait about one minute. The program works now and checks the connection to your server every second by pinging.

WinMTR does its work

After about one minute you can stop the process.

Use the “Copy text to clipboard” function to save the result to your clipboard. Then paste the text into your ticket. If it looks a bit unformatted, that’s not a big deal. We can still evaluate the data.

Thank you very much for your help!

Example

WinMTR Output

What additional costs can arise?

Name Costs
Server activation after abuse/anti-hack report one-time 5.00 Euro
Software installation (installation service) Mon-Fri: 15 Euro/15 minutes.
Weeekend/holidays: 30 Euro/15 minutes
Backup creation (optional) after abuse/anti-hack 15 Euro/15 minutes, excluding activation fee
Backup creation 15 Euro/15 minutes
Setup fees for dedicated servers 10.00 Euro, unless otherwise stated
Setup fees for additional IP addresses (dedicated servers, per IP address) 10.00 Euro/IP address
Traffic increase (vServers, KVM) 9.50 Euro per TB per month